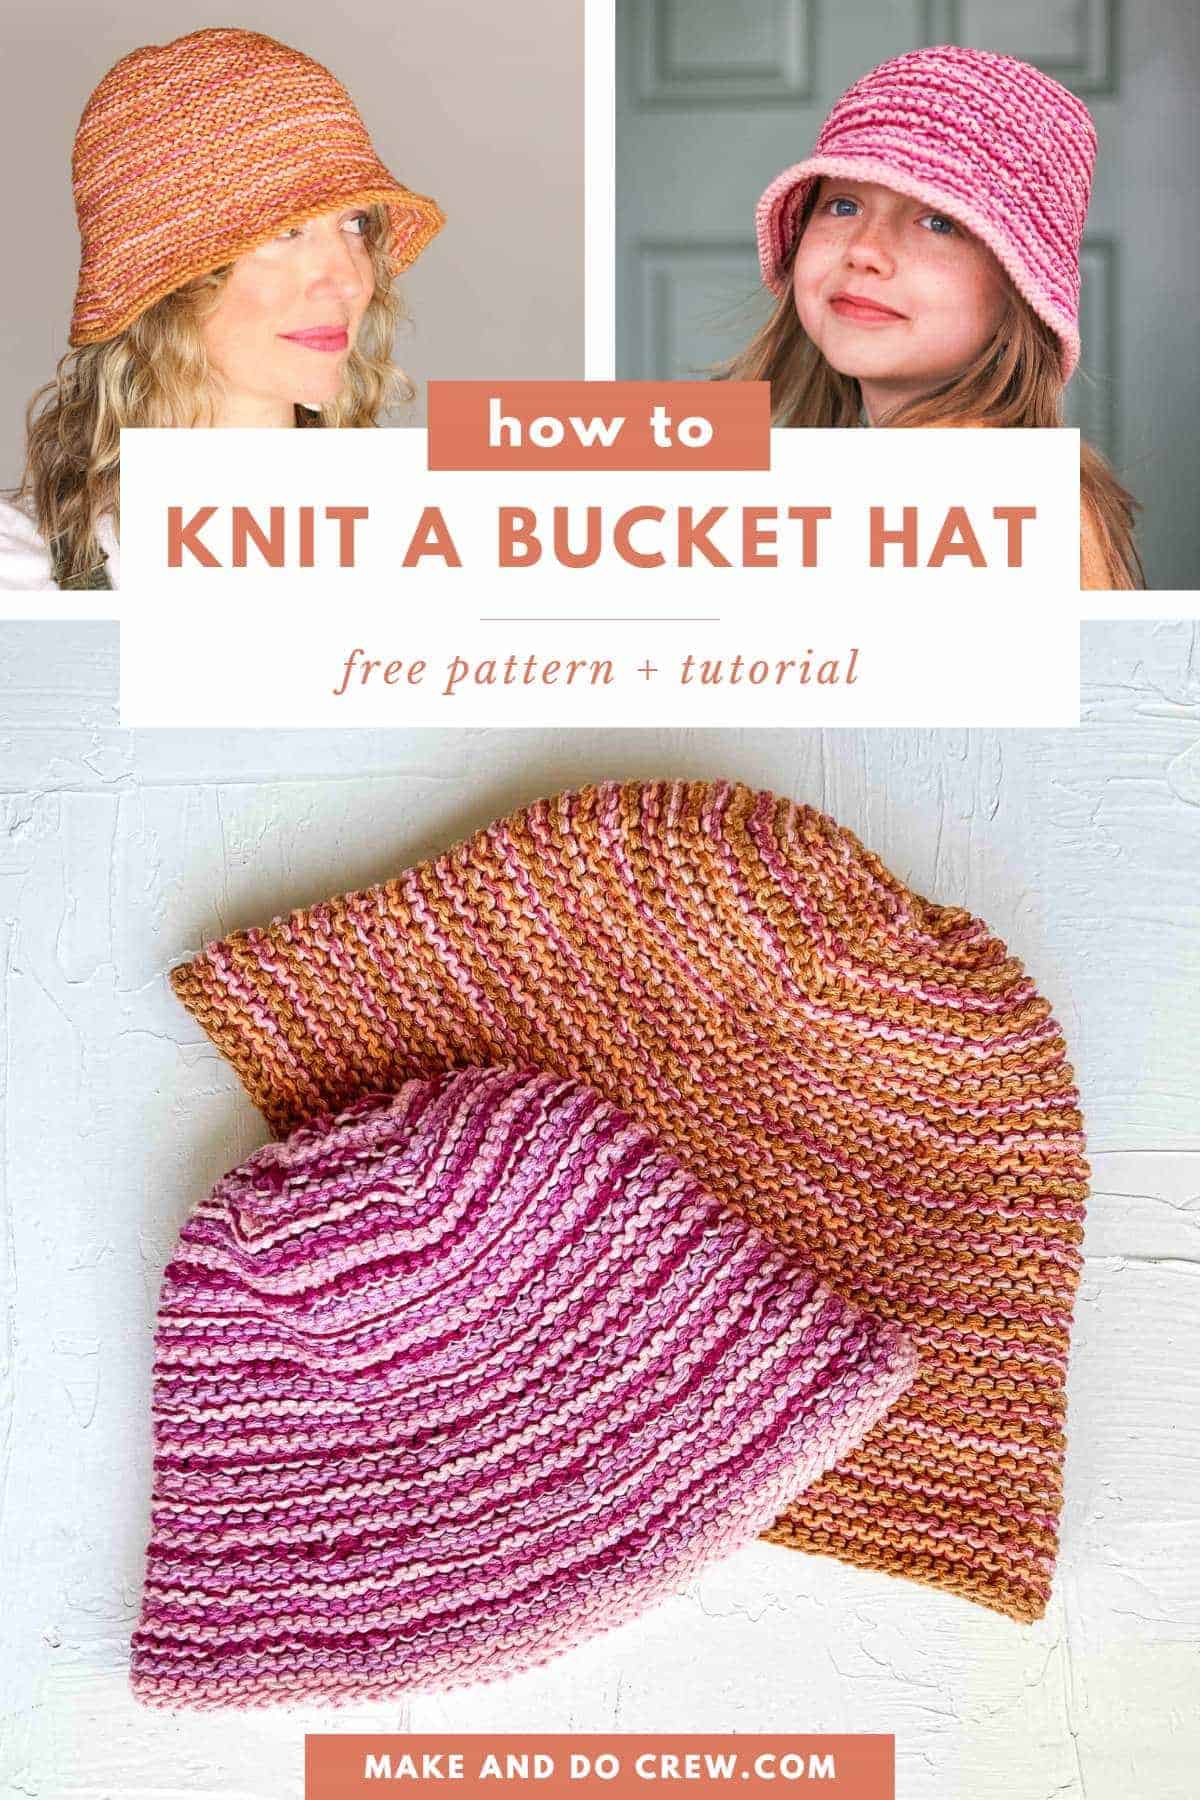
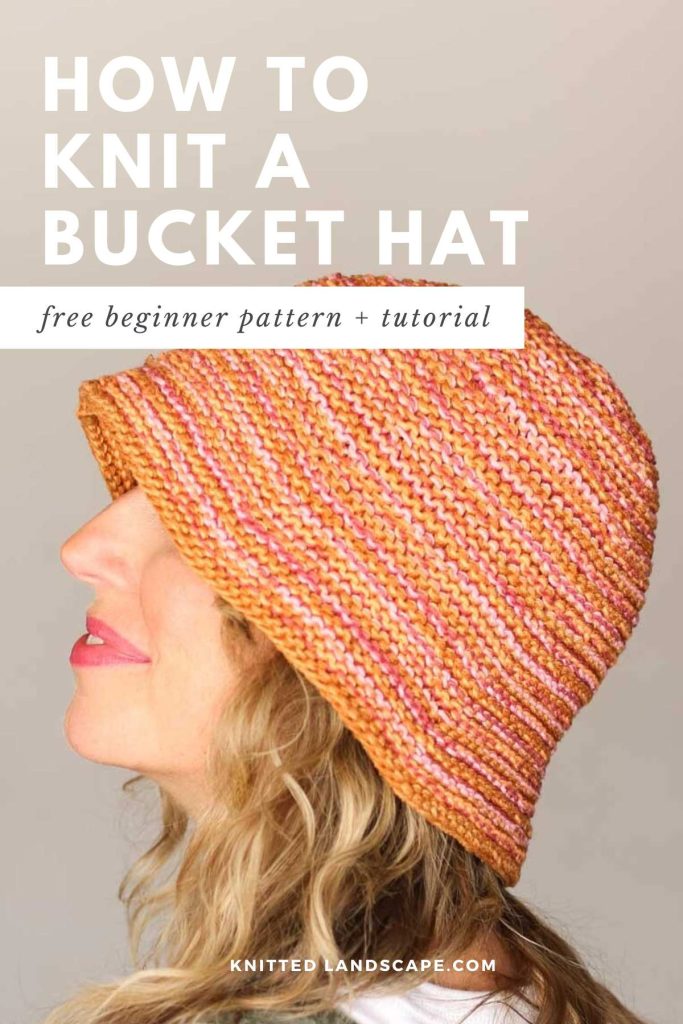
Free + Easy Bucket Hat Knitting Pattern
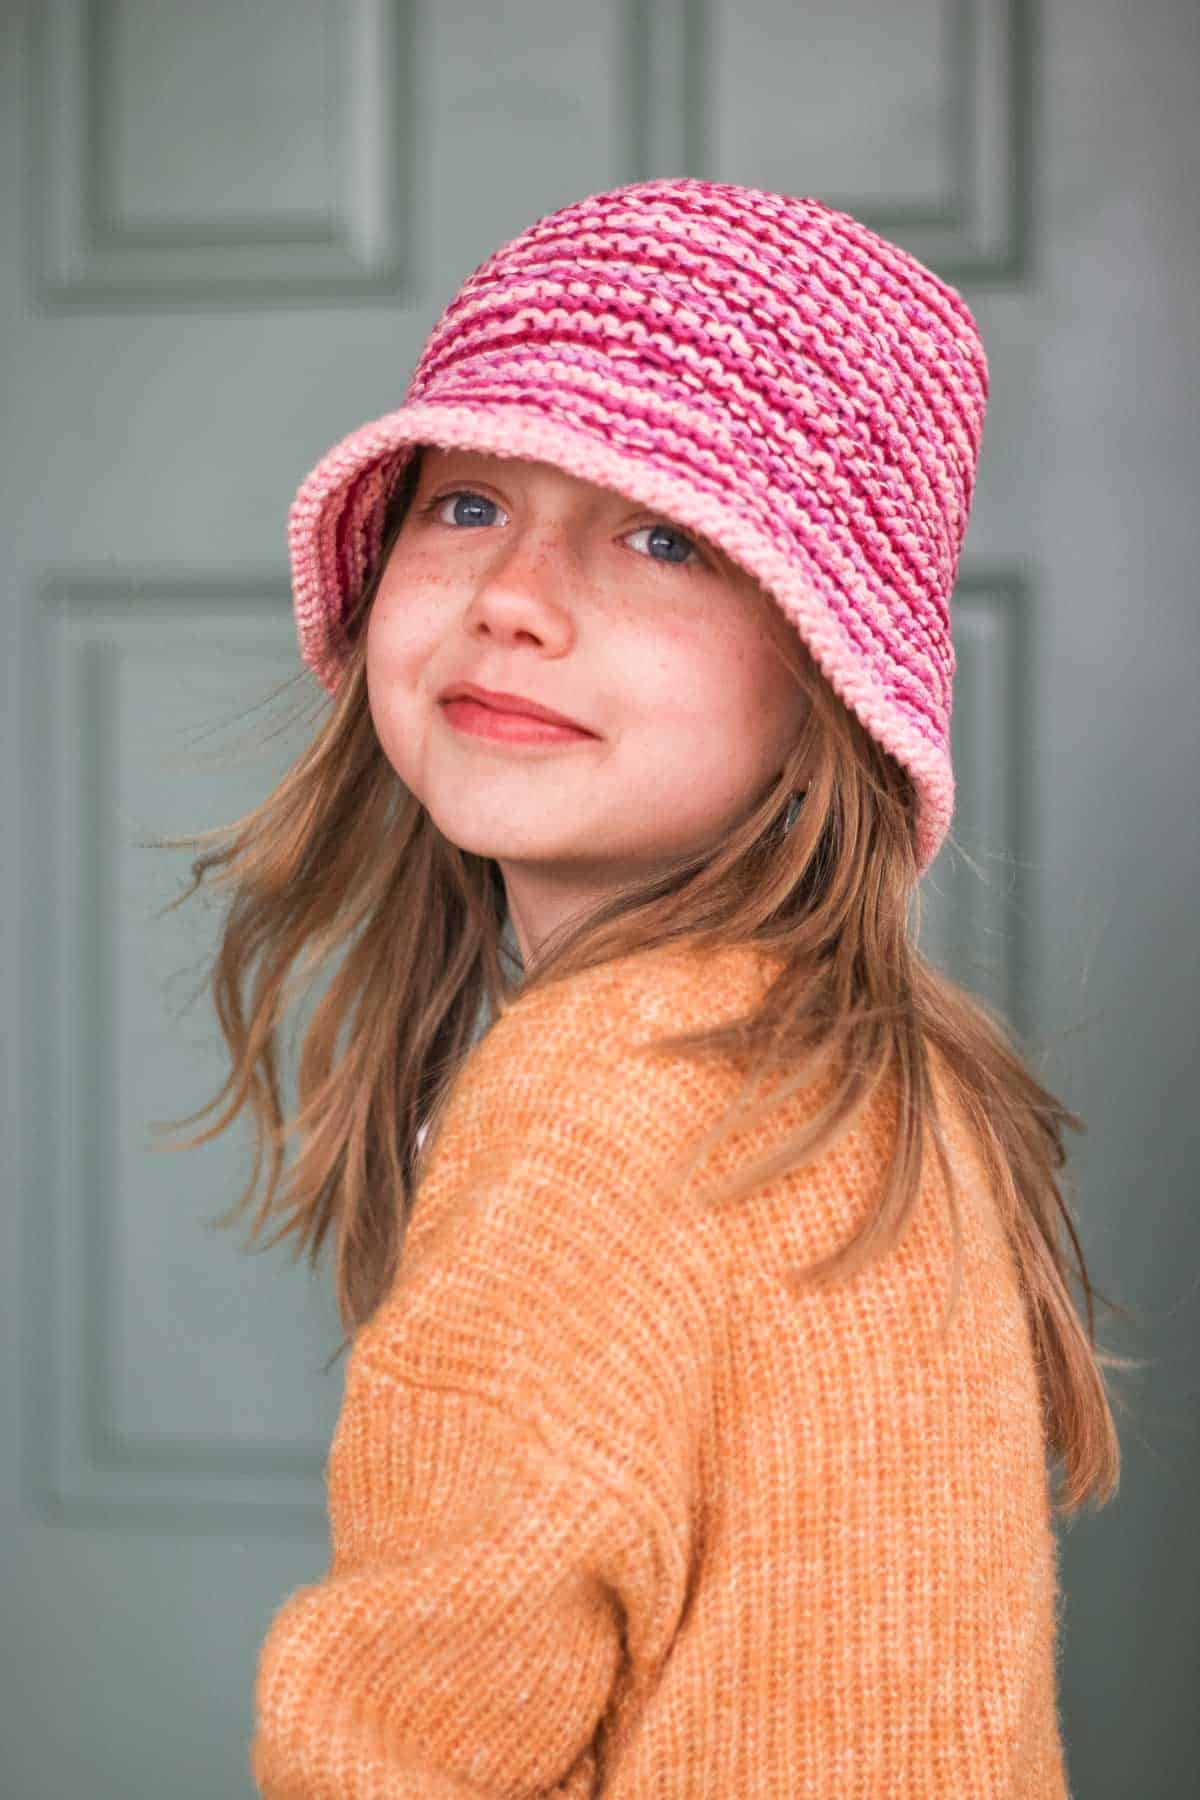
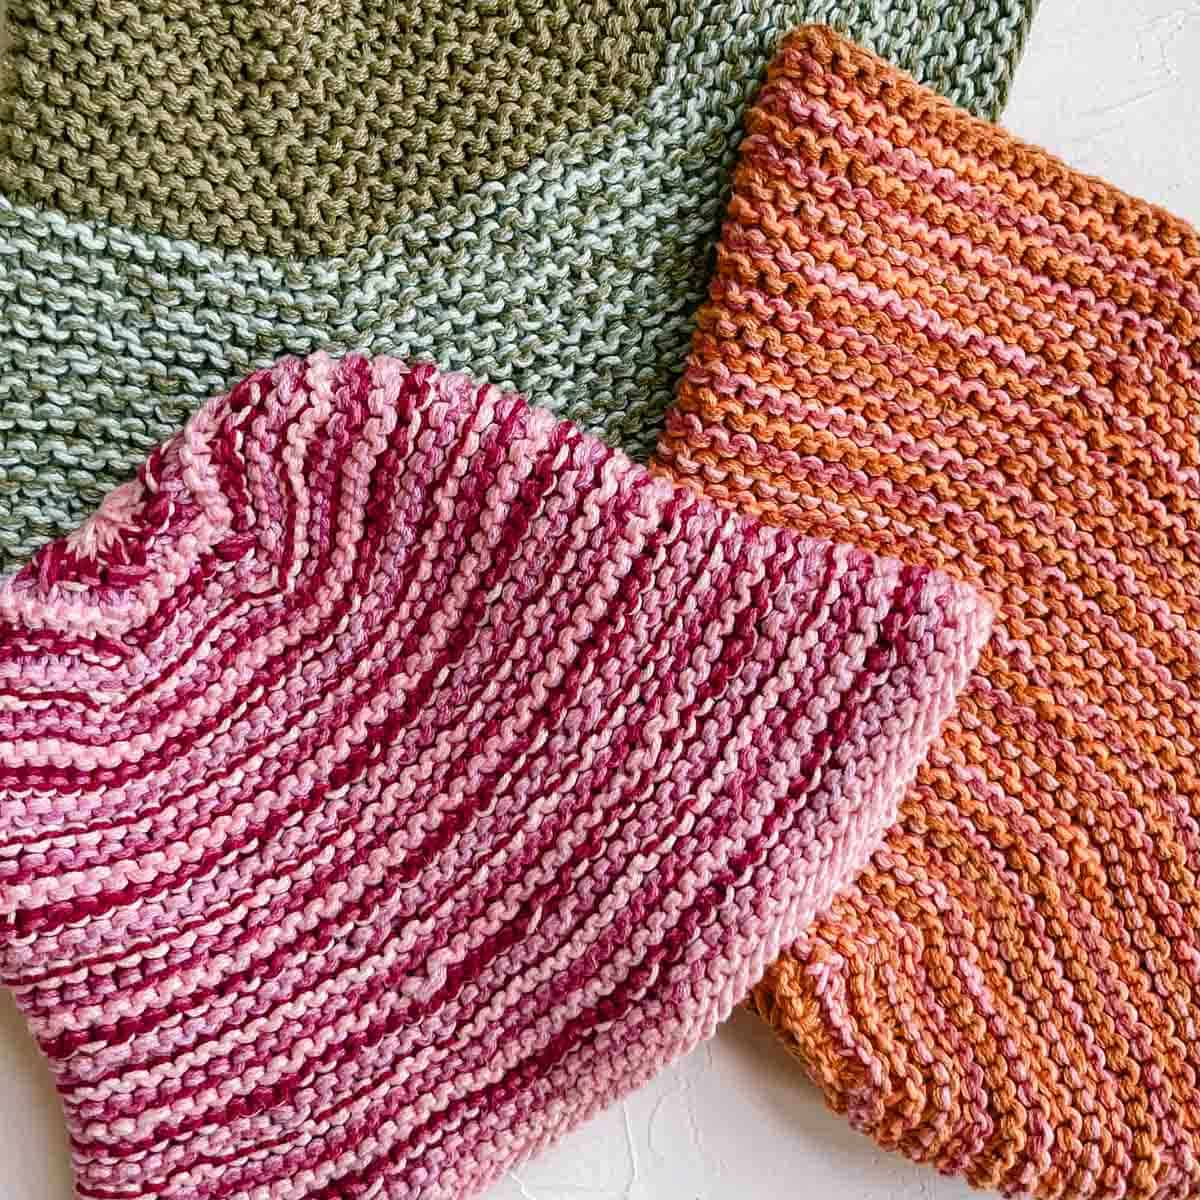
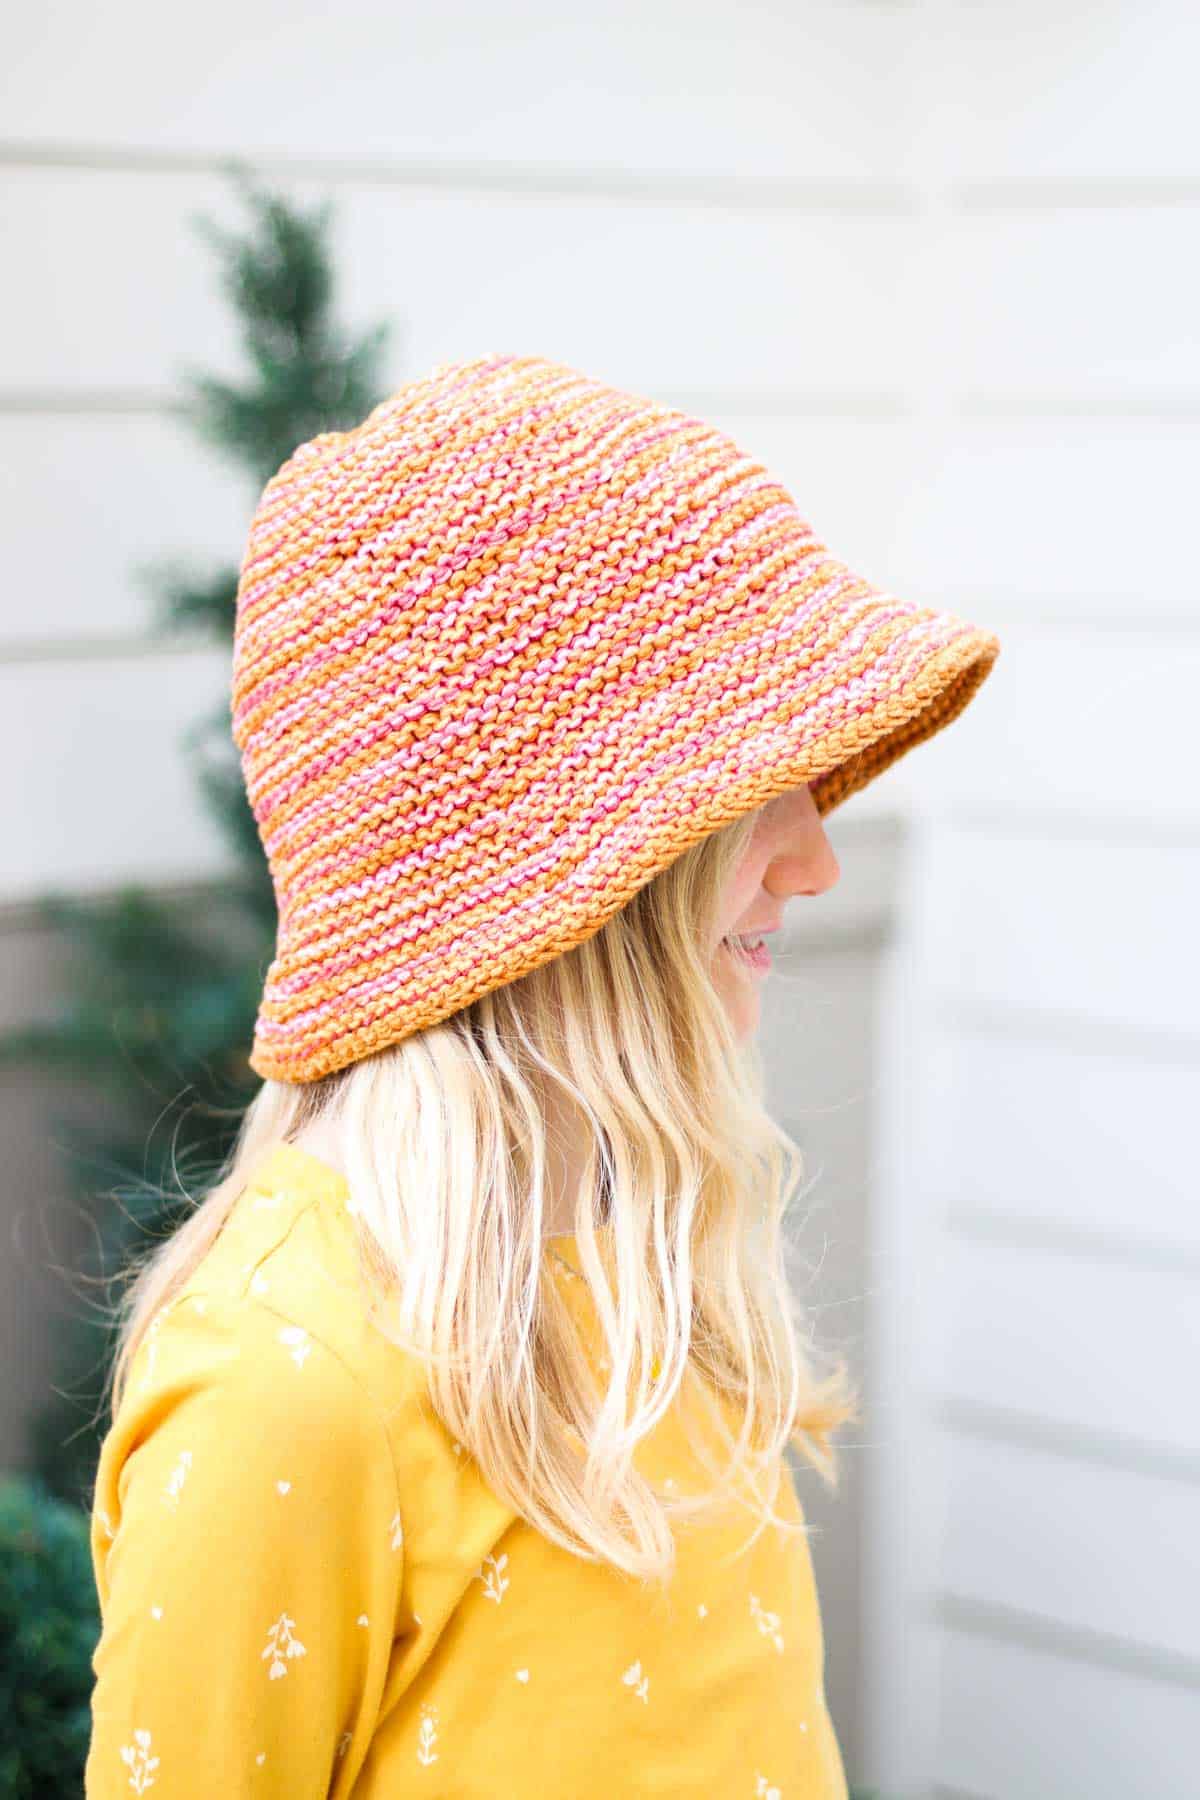
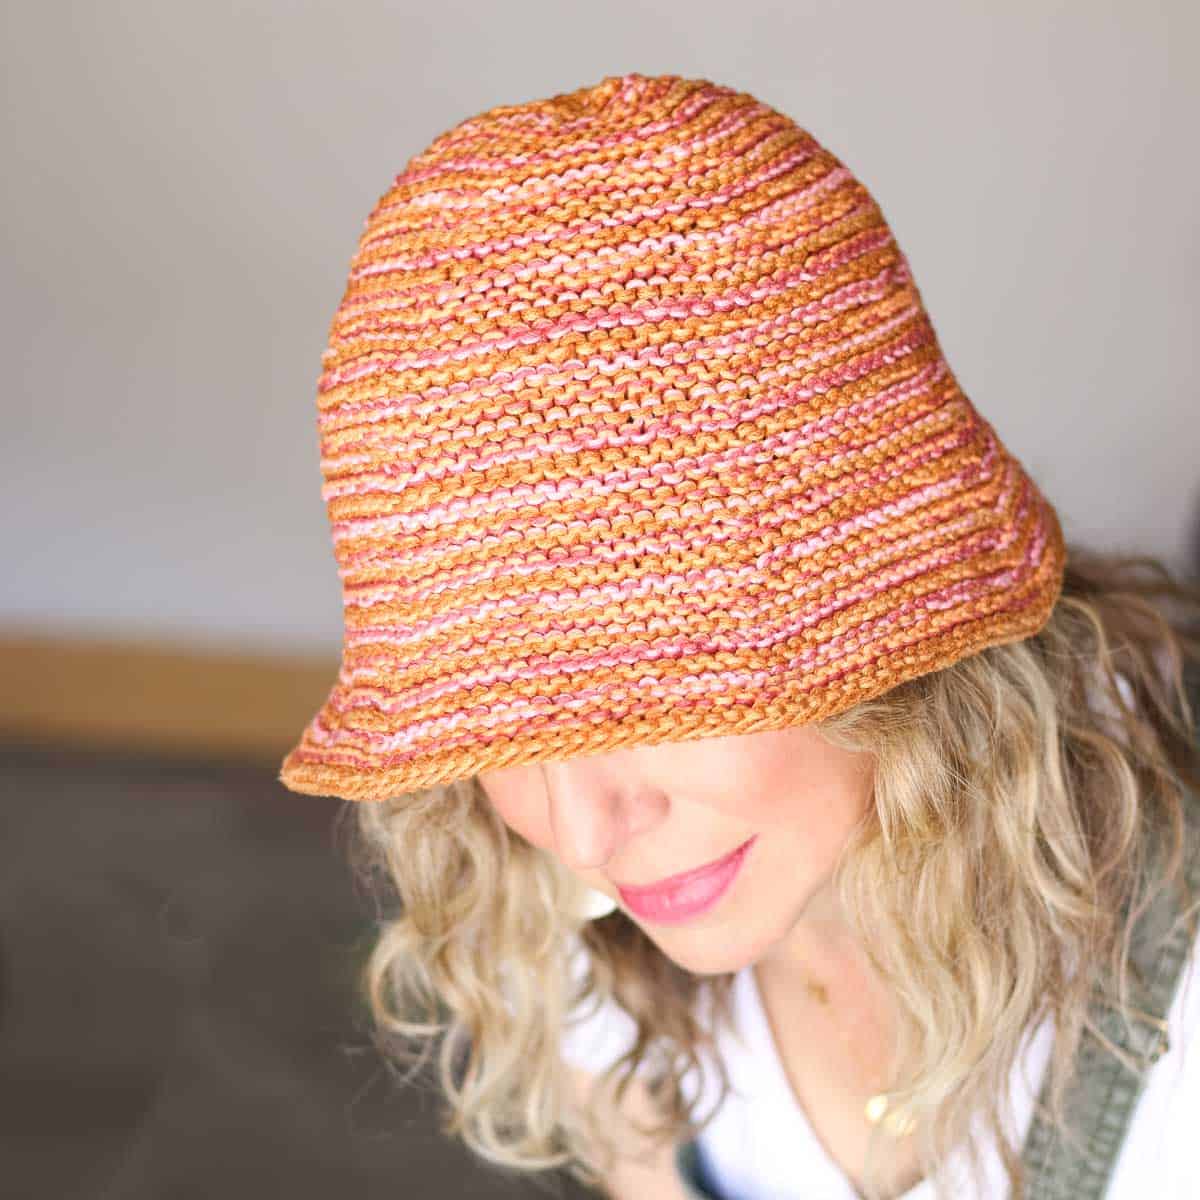
With its colorful and cheerful design, this knit bucket hat will surely become your new favorite summer style. Mercerized cotton yarn and the knit garter stitch combine in a moldable, comfy, and surprisingly-structured summer hat.
Try using up all your colorful yarn scraps or choose a specific color scheme to suit your style. Get the free bucket hat knitting pattern below or purchase the ad-free, printable PDF.
This bucket hat knitting pattern is part of a collaboration with Lion Brand Yarns. This post contains affiliate links.
Easy Knitted Bucket Hat Pattern
Bucket hats have become the essential urban topper, with brands like Madewell and Free People featuring “knit” bucket hats all over social media.
And while most handmade bucket-style hats are crocheted, my mom and I were determined to design a knitted version after the warm reception of our Scrappy Crochet Bucket Hat pattern.
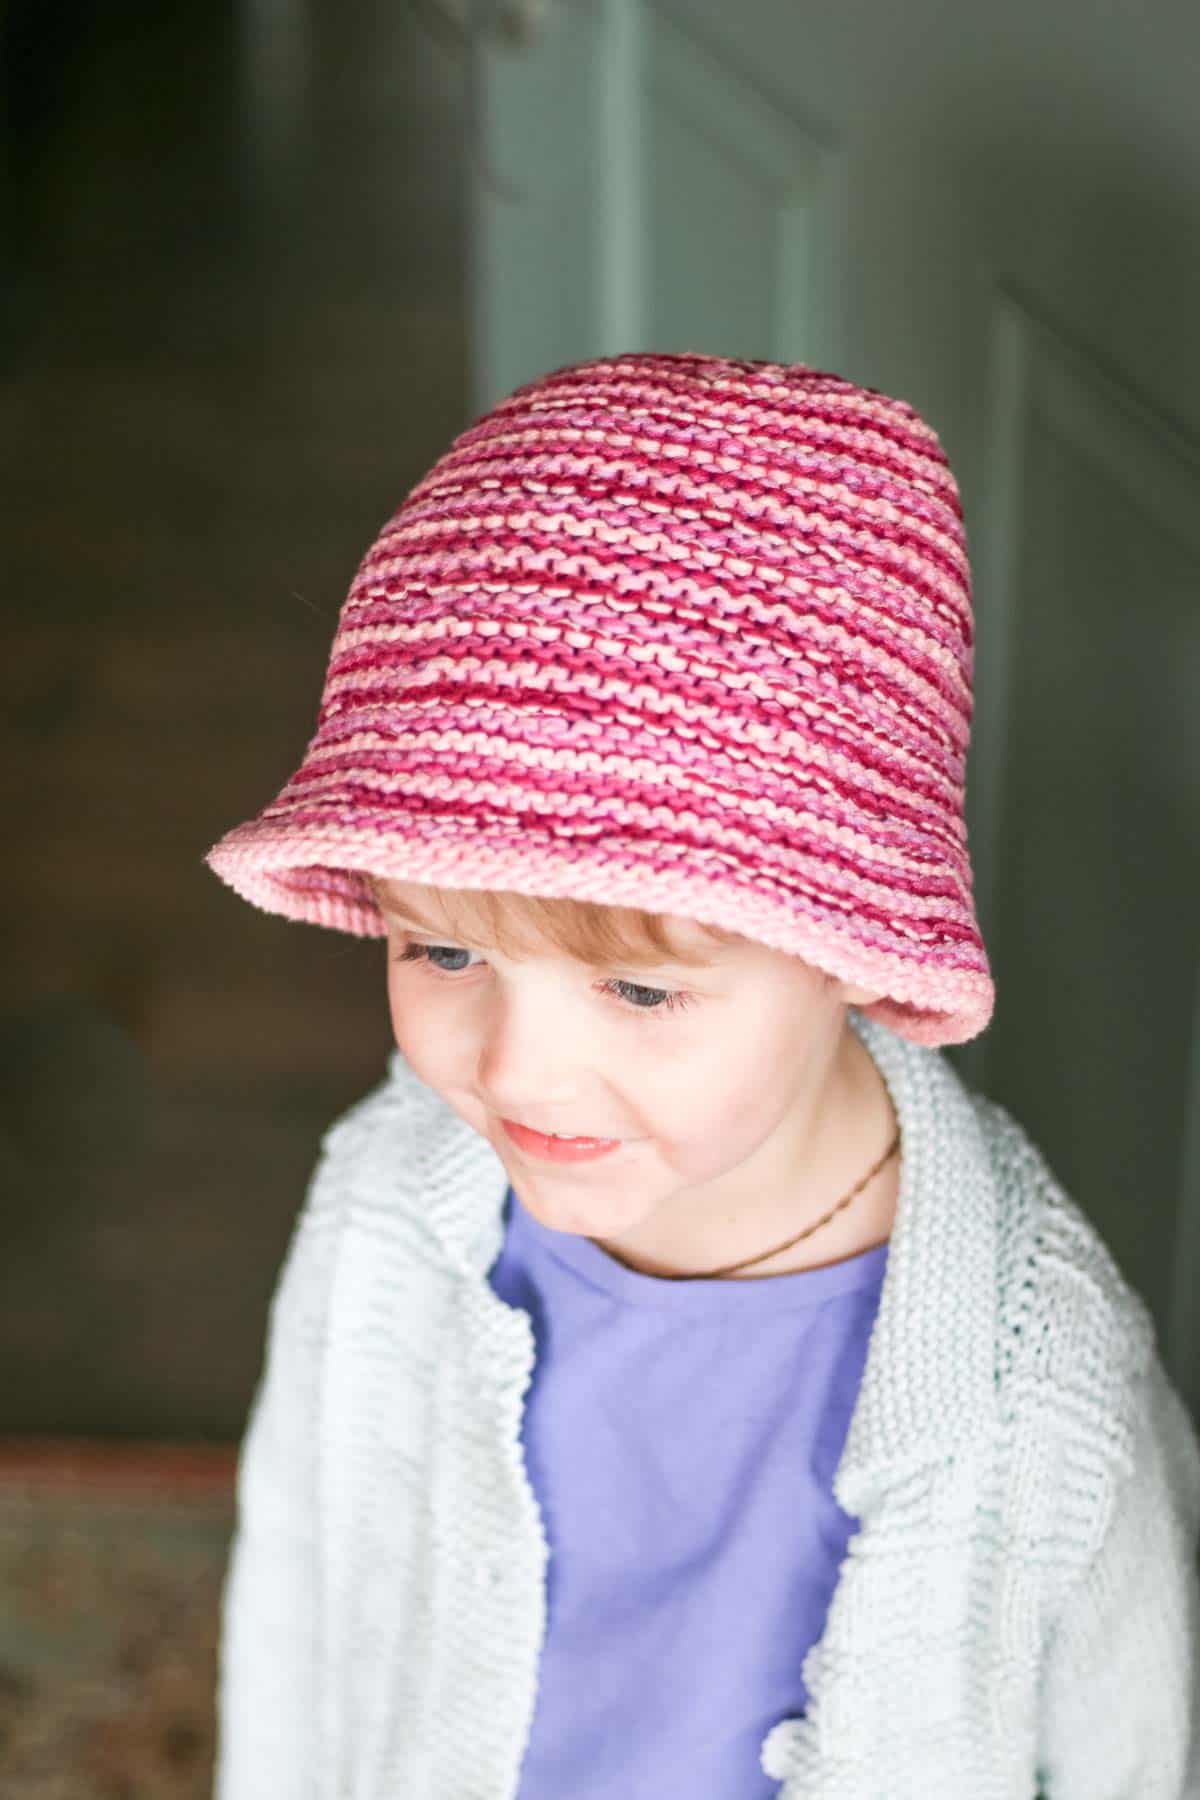
The resulting knit sun hat is packable, stiff enough to style in multiple ways, and ideal for all ages and genders.
Skill Level
Advanced-beginner skills you’ll practice in this free bucket hat knitting pattern include:
- Working in the round using circular and double-pointed needles
- Meeting a pattern gauge
- Changing colors (optional)
Why you’ll love knitting this hat!
How to Knit a Bucket Hat
This cute bucket-style hat is appropriate for advanced beginners eager to grow their skills. Let’s take a look at how the pattern comes together.
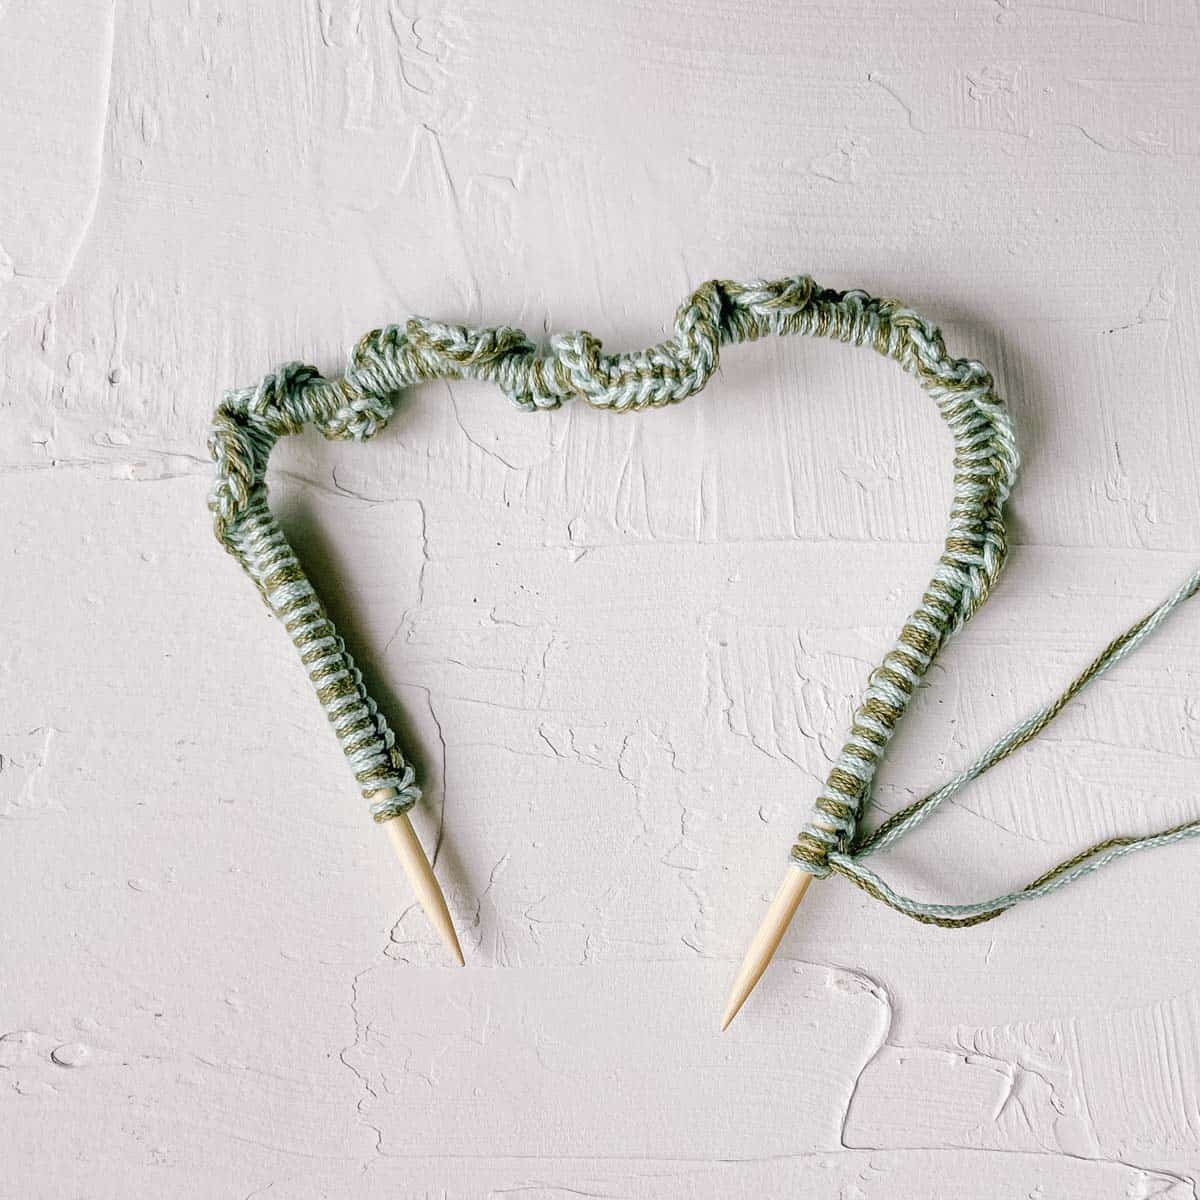
Step 1. You’ll cast on the brim stitches first using your circular needles.
Step 2. The brim is worked in the round with decreases every few rounds.
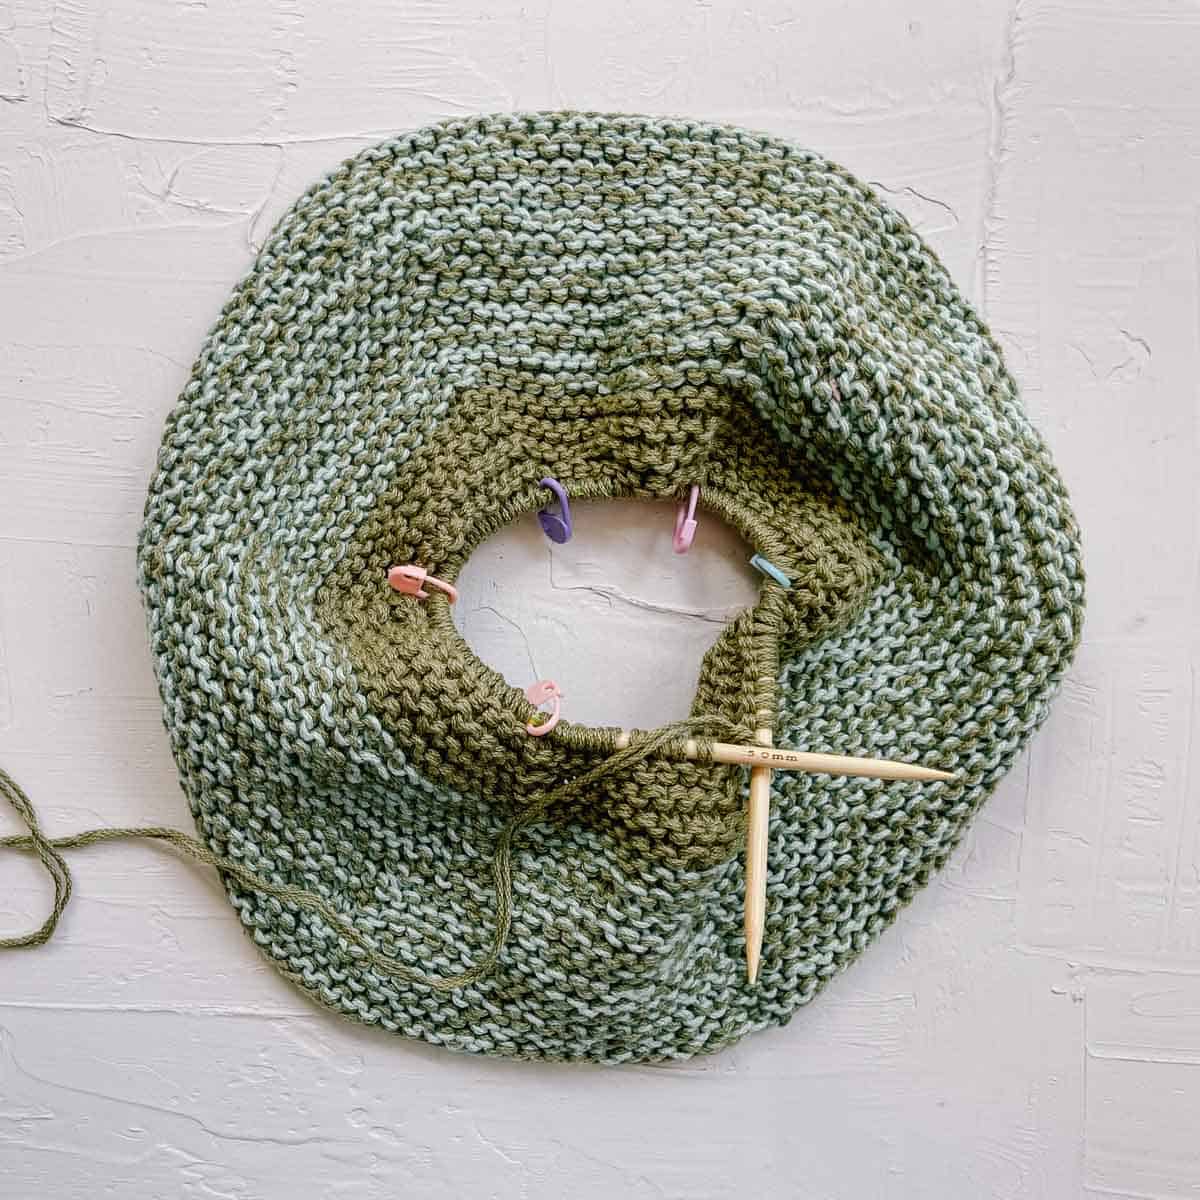
Step 3. You’ll cruise through the bucket section alternating rows of knitting and purling.
Step 4. Finish the the top circle using double-pointed needles to accommodate more decreasing.
Pattern Variations
If the scrappy, rainbow look is not your thing, there are many easy ways to customize this knit bucket hat pattern.
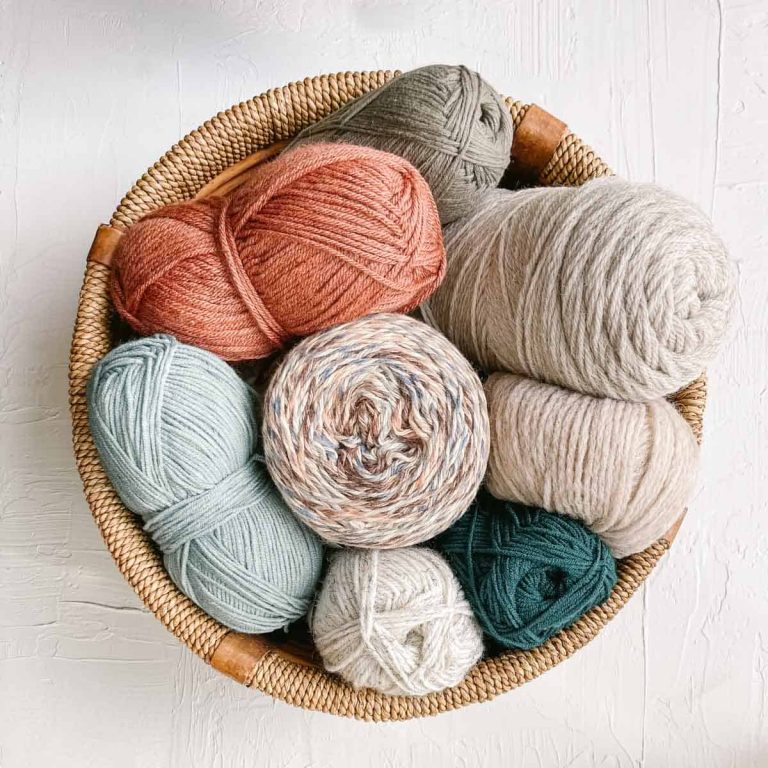
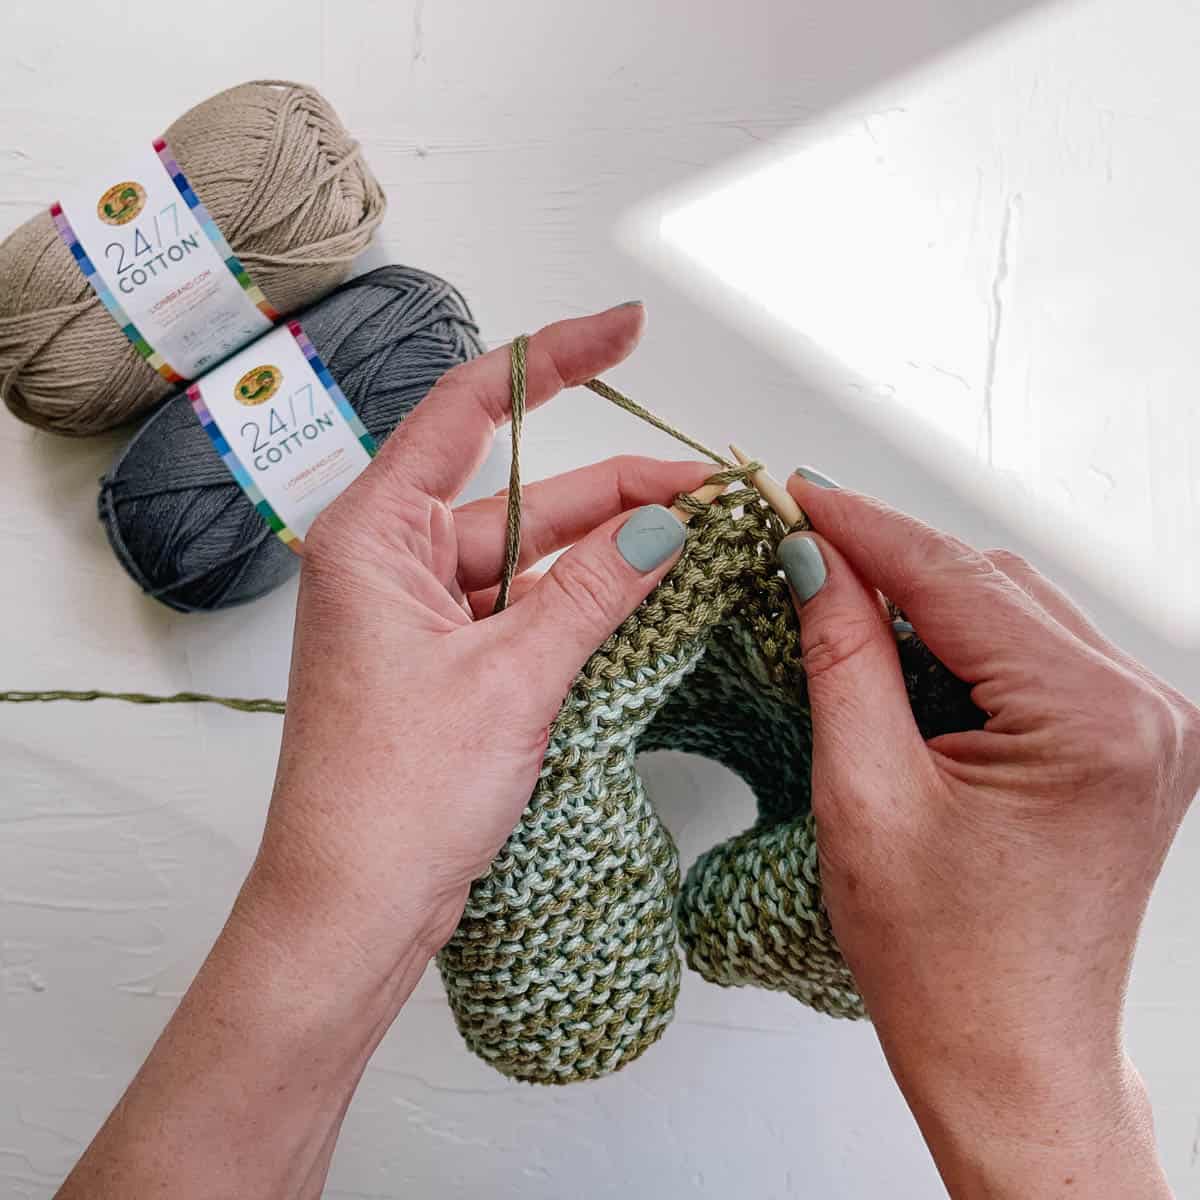
Best Yarn for a Knit Bucket Hat
We use Lion Brand’s 24/7 Cotton in this pattern. Holding two strands of yarn together throughout creates a more structured fabric with a scrappy, playful look.
I love using 24/7 Cotton for projects that need to hold their shape like bags and baskets. It’s mercerized, which means it can create a stiffer fabric than other types of cotton. Stiff is not usually a good thing when it comes to knit garments, but it’s perfect for a moldable bucket hat pattern.
Substitutions
You can substitute other light worsted-weight cotton yarns in this pattern. If you’d like to use a different yarn, checking your gauge is even more essential.
Lion Brand 24/7 Cotton is on the thinner side of medium-weight yarns. If you hold two strands of slightly thicker cotton together, you may want to size down one hat size.
All-in-One Knit Kit
If you don’t live near amazing yarn stores or if you just like to get fun packages in the mail, the all-in-one kit is a perfect way to make your Scrappy Knit Bucket Hat. This bundle from Lion Brand includes all the 24/7 Cotton yarn you’ll need, plus a bonus printable PDF of the pattern (delivered digitally).
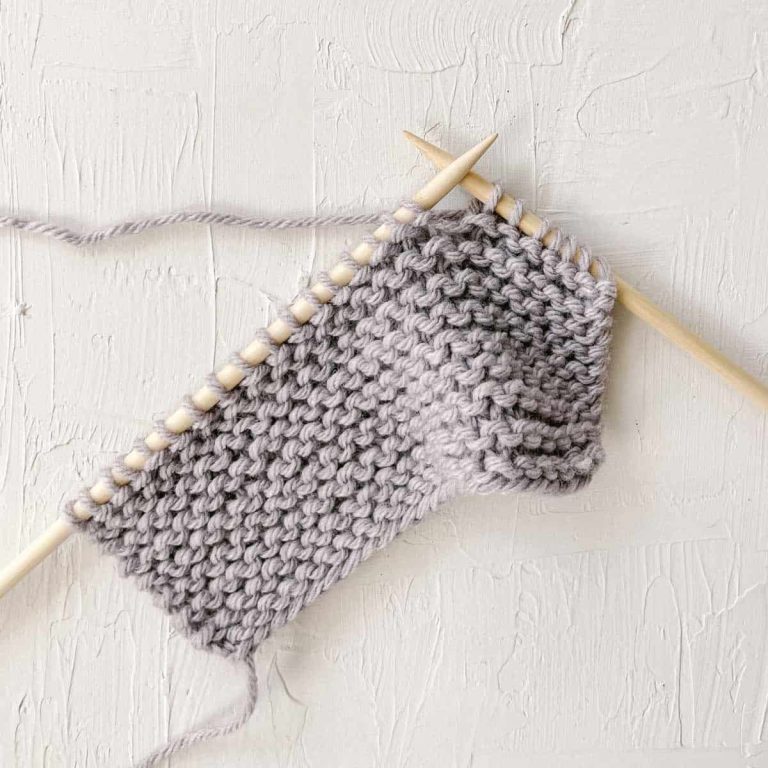
Pattern Stitches
This bucket style hat knitting pattern uses nothing but knit and purl stitches.
If the garter stitch means you knit every row, why do we need to purl in this pattern? Good question! Because we’re knitting in the round, we alternate rows of knit stitches with rows of purl stitches to create the bumpy look of garter stitches.
To shape the knitted brim and bucket of the hat, we use two types of decreases: knit two together (k2tog) and pass slip stitch over (psso). Not to worry though, I’ve included detailed instructions on how to work these stitches below.

Tips for Knitting a Bucket Hat
Meeting the pattern gauge is critical when knitting hats that need to be a certain size. Why? Making sure your stitches are the same size as the designers will ensure your bucket hat has the measurements listed in the pattern.
I’ve included instructions for measuring your gauge several rounds in – this is a step you definitely don’t want to skip. If your stitches are tighter or looser than the given pattern gauge, it’s always okay to change needle sizes to get the correct tension.
Print This Pattern
Prefer to crochet on the couch? Need a portable, printable pattern? You’ll love the premium PDF! The instantly downloadable, ad-free file is formatted for easy printing and includes the complete pattern and the photo tutorials.
Upgrade to the Printable PDF
formatted for effortless printing and relaxing couch crocheting
Scrappy Knit Bucket Hat – Free Pattern
Explanation:
With its colorful and cheerful design, this bucket hat will surely become your new favorite summer hat. Mercerized cotton yarn and the knit garter stitch combine in a moldable, comfy, and surprisingly structured hat. You can use up all your colorful yarn scraps or select a specific color scheme to suit your style.
Supplies + Materials
Order an all-in-one kit from Lion Brand here.
• Lion Brand 24/7 Cotton (Weight: 4/Medium- 186 yds, 3.5 oz / 100 g)
See yarn amounts required per size below.
* Each sample uses five colors. Five balls of 24/7 Cotton is enough yarn to make two hats in any of the below sizes.
• Size 5 (3.75 mm) or size needed to obtain gauge – 16” circular knitting needle
• Size 5 (3.75) or size needed to obtain gauge – four double-pointed needles
Sizes
| SIZE | FITS HEAD MEASUREMENTS | BRIM LENGTH | YARN NEEDED |
|---|---|---|---|
| S (toddler) | 16-18” | 2” | 99 g |
| M (child) | 18-20″ | 2.5″ | 143 g |
| L (adult) | 20-22″ | 3.5″ | 182 g |
| XL (larger adult) | 22-24″ | 3.5″ | 220 g |
Gauge
14 sts x 32 rows = 4”
Check your gauge periodically to make sure your hat fits as intended.
Abbreviations + Glossary
(US Terms)
CO – cast on
K – knit
K2tog – knit 2 together
p – purl
PM – place marker
psso – pass slip stitch over
rep –- repeat
RS – right side
sk – skip
st(s) –stitch(es)
tog – together
WS – wrong side
yo – yarn over
Skill Level
The advanced-beginner skills you’ll practice include knitting in the round using circular and double-pointed needles and meeting a pattern gauge.
Permissions + Copyright:
Please do not publish or share this pattern as your own. You may make items to sell with this pattern. In exchange, please link back this post. Do NOT use our photos as your own sales photos.
Explanation of Color Planning:
- Hat is knit holding two strands of Lion Brand 24/7 Cotton together throughout until final round of pattern. Samples pictured use two different colors of yarn at all times working in a random pattern where each color is used for two rounds in a row.
- For example:
- Round 1: A/B
- Round 2: B/C
- Round 3: C/D
- Round 4: D/E and so on.
- In the sample knit bucket hats, no particular pattern was followed besides the each-color-is-used-for-two-consecutive-rounds rule, meaning that the stripes are not uniform or necessarily predictable.
- To create the fewest ends to weave in, you may keep all yarn colors attached throughout. When doing this, drop unused colors and pick each up when you need to use them again.
- If keeping all colors attached is too cumbersome, cut yarn when rounds are complete. Use the same two colors held together throughout for a more beginner-friendly bucket hat instead of switching colors each round.
- Overall, this bucket hat is intended to be playful and organic in its color patterning. Don’t stress too much about planning your stripes, and instead enjoy watching your art unfold!
Overall Pattern Notes
- Place marker in designated stitch of foundation round and moved as each round is worked. This is critical in keeping track of the beginning/end of each round. This also ensures that decreases are spaced evenly around.
When decreasing, knit to last 2 sts. Sl 1, k 1, psso to make the decrease. If possible use a different color marker for the the beginning/end of row.
- After Round 11, you will pause to measure your stitch gauge. This is crucial to ensuring your knit bucket hat fits. If you prefer to avoid making a gauge swatch, know that you may need to start over with smaller or larger needles if your gauge isn’t 14 stitches/4” after Round 11.
- Instructions are organized by sizes: S and M are together, and L and XL are together. It can be helpful to highlight the instructions for the size you are making.
- Hat is worked in garter stitch. Because you are knitting in the round, you will purl all odd rows and knit all even rows.
- “Work in pattern” means you’ll continue in the pattern that has already been established. In this case, you’ll purl each stitch in odd-numbered rows and knit each stitch in even-numbered rows.
Print This Pattern: purchase the ad-free, printable PDF
How to Knit the Psso Decrease
This is how we’ll decrease throughout the brim and hat top.
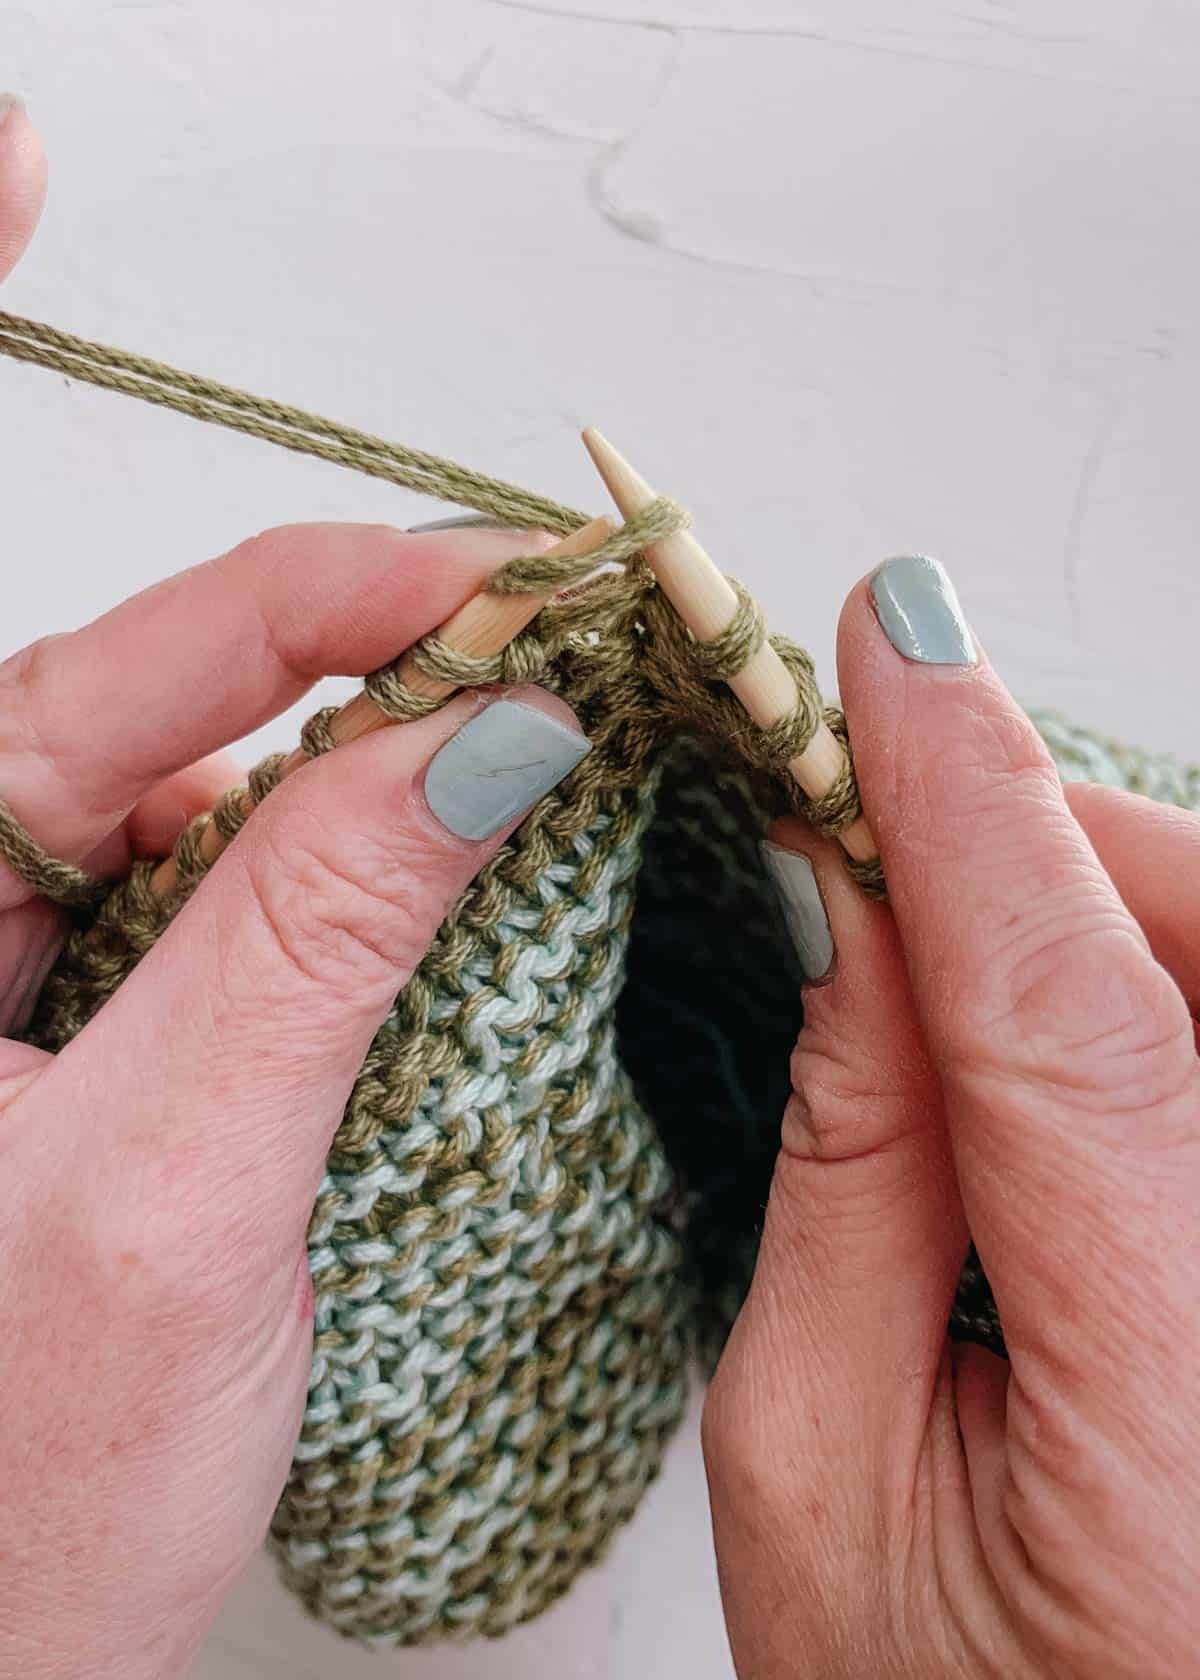
Step 1: Insert needle in stitch as if knitting. Slide it off left needle onto right needle. (Without knitting it.)
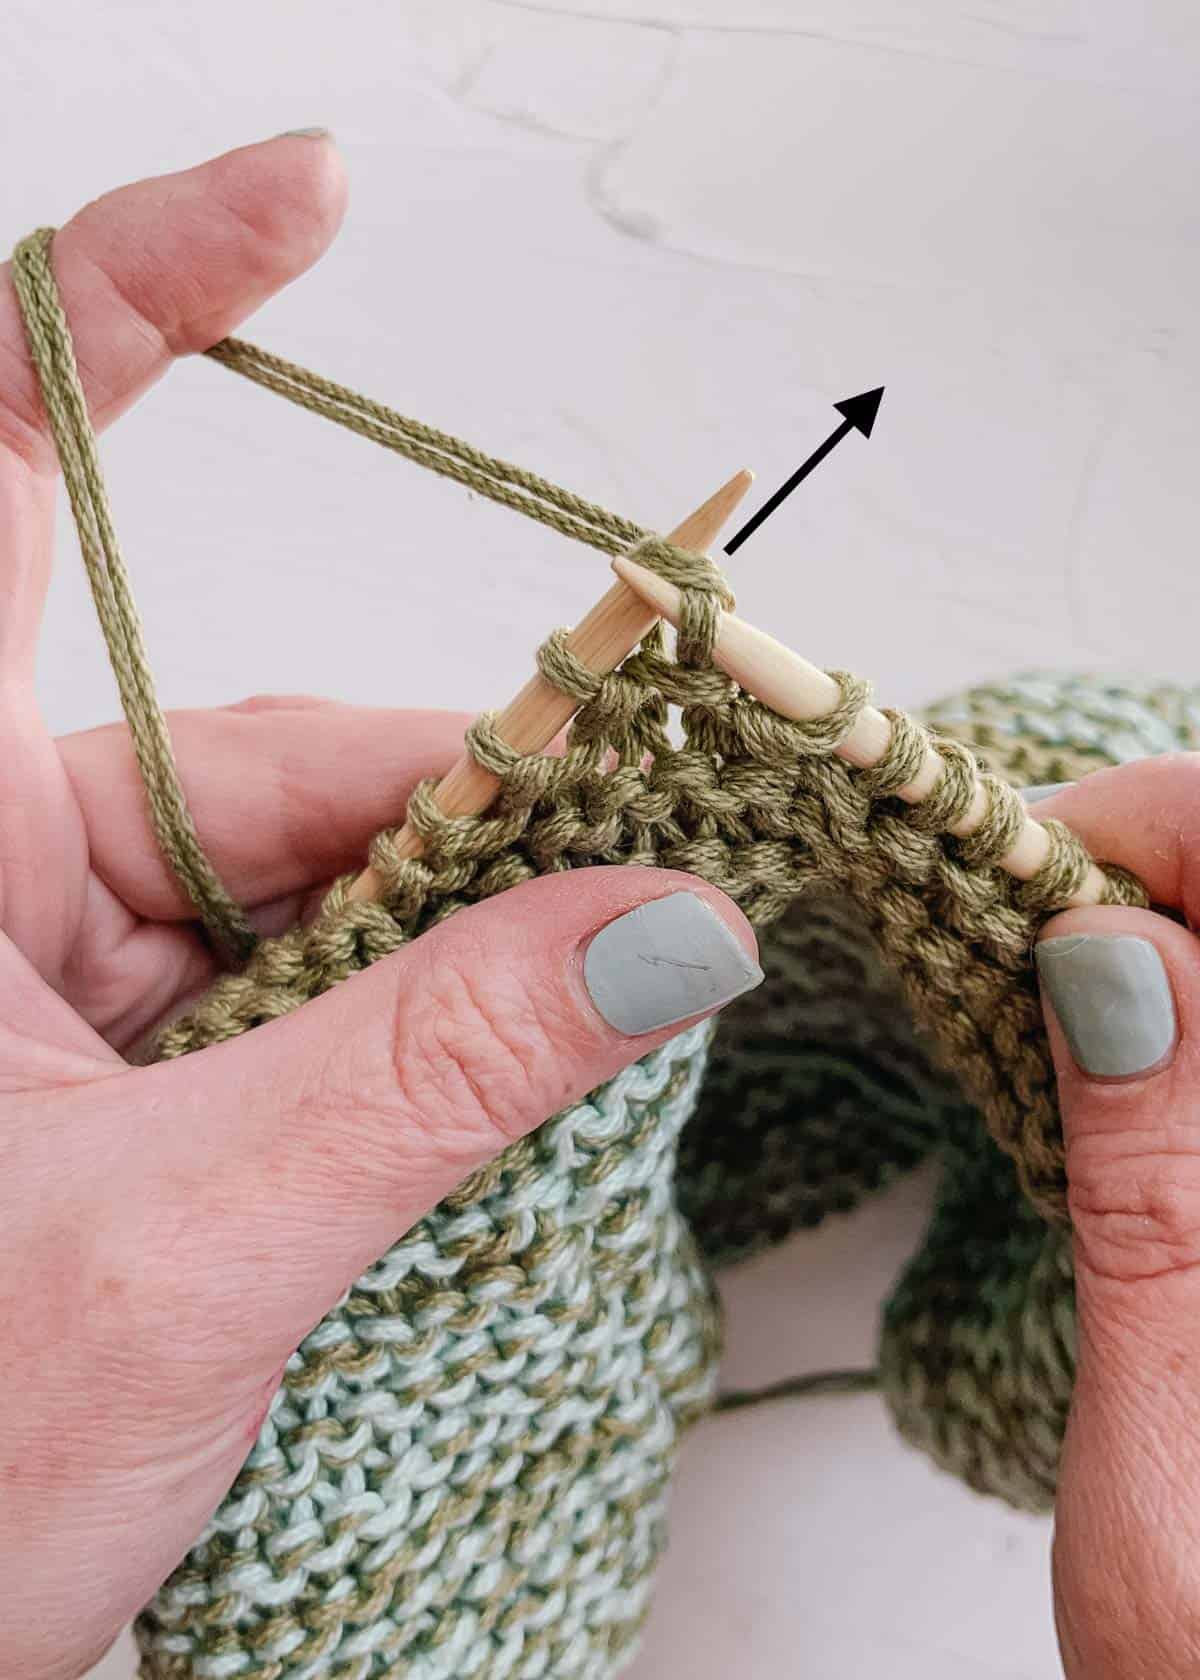
Step 2: Knit the next stitch as usual.
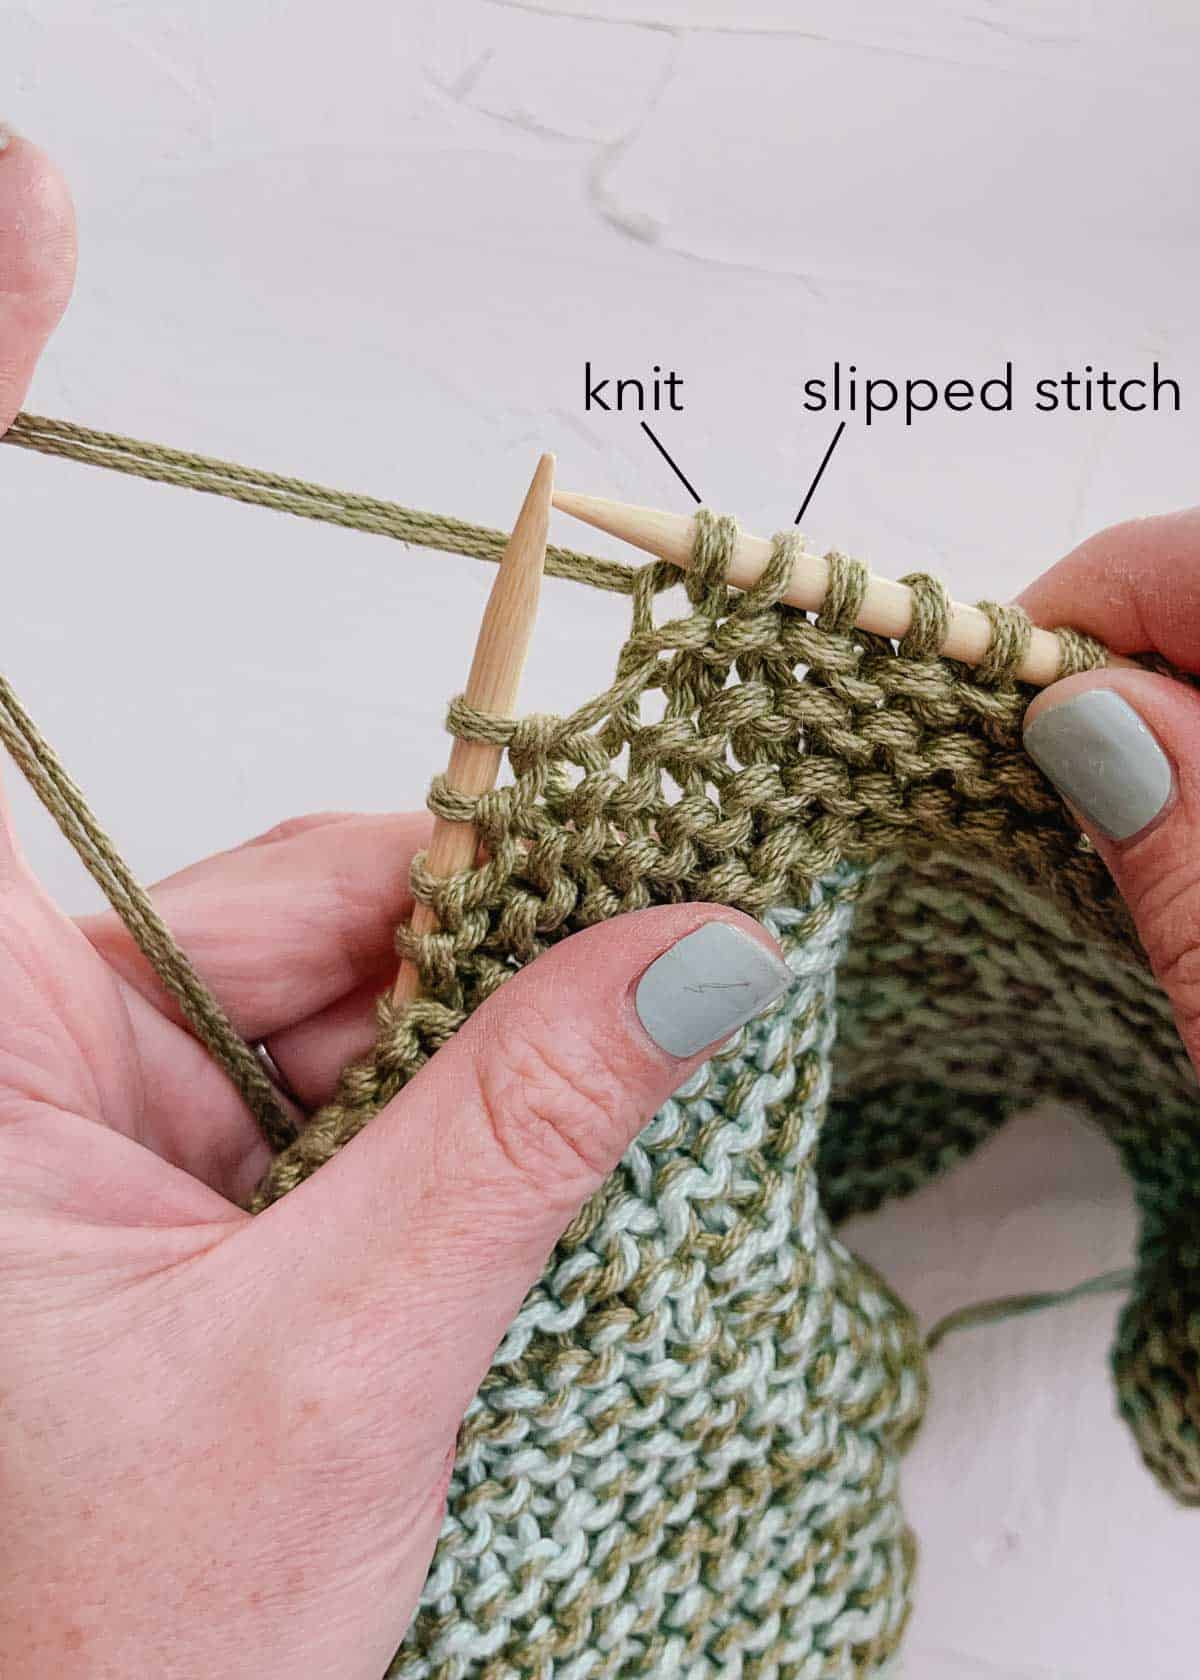
Step 3: Both stitches are now on right needle.
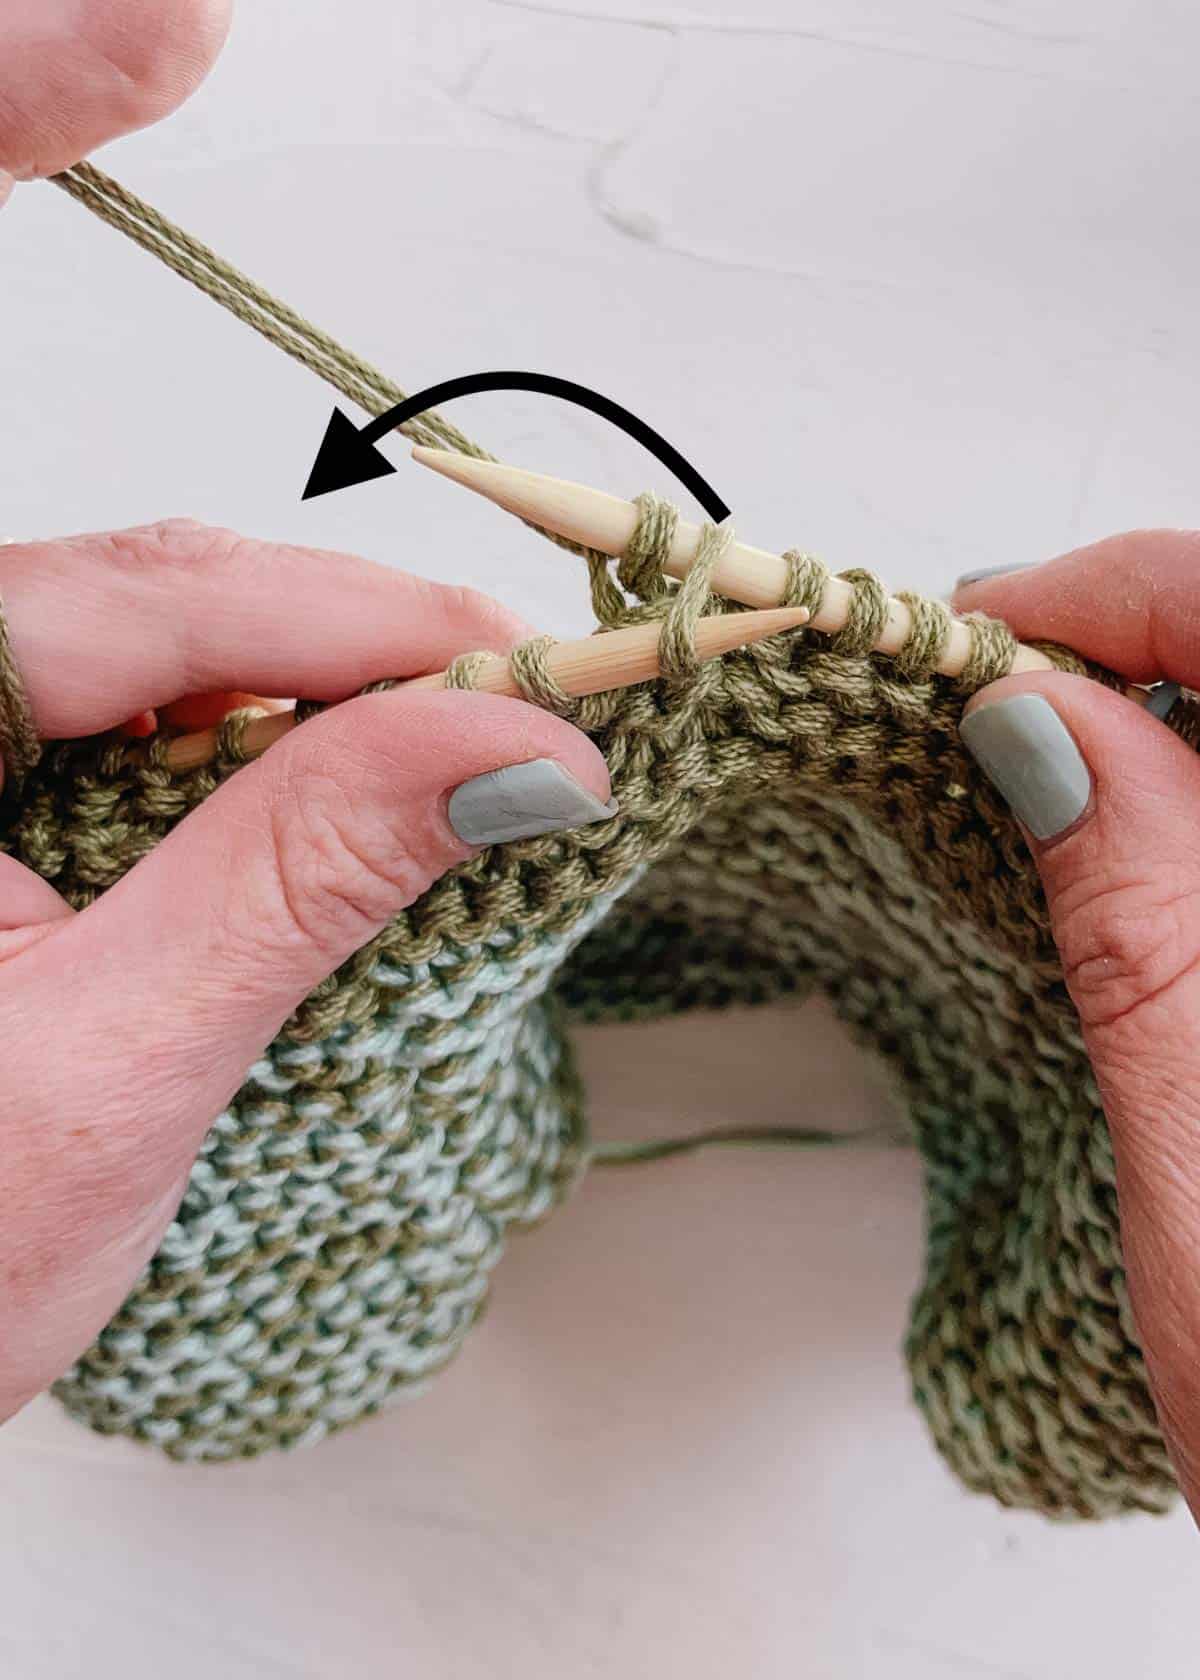
Step 4: Insert left needle in slipped stitch and lift it over knit stitch.
Hat Brim
Notes:
- Hat is worked in the round. Make sure not to twist the Foundation Row when joining.
Sizes Small and (Medium)
With 2 strands held together:
Foundation Row: *CO 16 (17) sts, PM, rep from * 5 more times for a total of 96 (102) sts
Round 1: Purl each st
Round 2: Knit each st
Round 3: Purl each st
Round 4 [dec]: *K 15 (16), [sl 1, k1, psso], rep from * around (90 (96) sts)
Rounds 5-7: Work in pattern
Round 8 [dec]: *K 14 (15), [sl 1, k1, psso], rep from * around (84 (90) sts)
Rounds 9-11: Work in pattern
Important: Pause here to measure your stitch gauge. If you have more than 14 sts per 4”, start over with larger needles. If you have fewer than 14 sts per 4”, start over with smaller needles.
Round 12 [dec]: *K 13 (14), [sl 1, k 1, psso], rep from * around (78 (84) sts)
Rounds 13-15: Work in pattern
Row 16 [dec]: *K 12 (13), [sl 1, k 1, psso], rep from * around (72 (78) sts)
Size S only: Stop here and continue to Hat Bucket section.
Size M carry on below:
Rounds 17-19: Work in pattern
Round 20 [dec]: *K – (12), [sl 1, k 1, psso], rep from * around (- (72) sts)
Continue to Hat Bucket section.
Sizes Large and (Extra Large)
With 2 strands held together:
Foundation Row: *CO 21 (22) sts, PM, rep from * 5 more times for a total of 126 (132) sts.
Round 1: Purl each st
Round 2: Knit each st
Rounds 3 and 4: Rep Rows 1 and 2
Round 5: Purl each st
Round 6 [dec]: *K 19 (20), [sl 1, k 1, psso], rep from * around (120 (126) sts)
Round 7-11: Work in pattern
Important: Pause here to measure your stitch gauge. If you have more than 14 sts per 4”, start over with larger needles. If you have fewer than 14 sts per 4”, start over with smaller needles.
Round 12 [dec]: *K 18 (19), [sl 1, k 1, psso], rep from * around (114 (120) sts)
Round 13: Purl each st
Round 14 [dec]: * K 17 (18), [sl 1, k 1, psso], rep from * around (108 (114) sts)
Rounds 15-17: Work in pattern
Round 18 [dec]: * K 16 (17), [sl 1, k 1, psso], rep from * around (102 (108) sts)
Rounds 19-21: Work in pattern
Round 22 [dec]: * K 15 (16), [sl 1, k 1, psso], rep from * around (96 (102) sts)
Round 23-25: Work in pattern
Round 26 [dec]: *K 14 (15), [sl 1, k 1, psso], rep from * around (90 (96) sts)
Round 27: Purl each st
Round 28 [dec]: K 13 (14), [sl 1, k 1, psso], rep from * around (84 (90) sts)
Premium PDF
easier and faster with fewer mistakes.
- Complete pattern + photo tutorials
- Instant download
- Formatted for easy printing
Hat Bucket
We’ll now move onto the bucket portion of the hat, which is worked without decreasing.
Sizes Small and (Medium)
Size S only:
Rounds 17-19: Work in pattern
Round 20 [dec]: *K 11 (-), [sl 1, k 1, psso], rep from * around (66 (-) sts)
Both sizes:
Rounds 21-31 (21-41): Work in pattern
Size M only: Stop here and continue to Hat Top section.
Size S only:
Round 32 [dec]: *K 10 (-), [sl 1, k 1, psso], rep from * around (60 (-) sts)
Continue to Hat Top section.
Sizes Large and (Extra Large)
Rounds 29-39 (29-43): Work in pattern
Round 40 (44) [dec]: * K 12 (13), [sl 1, k 1, psso], rep from * around (78 (84) sts)
Rounds 41-45 (45-49): Work in pattern
Round 46 (50) [dec]: * K 11 (12), [sl 1, k 1, psso], rep from * around (72 (78) sts)
Rounds 47-49 (51-53): Work in pattern
Round 50 (54) [dec]: *K 10 (11), [sl 1, k 1, psso], rep from * around (66 (72) sts)
Rows 51-53 (55-57): Work in pattern
Round 54 (58) [dec]: *K 9 (10), [sl 1, k 1, psso], rep from * around (60 (66) sts)
Rounds 55-57 (59-61): Work in pattern
Round 58 (62) [dec]: *K 8 (9), [sl 1, k 1, psso], rep from * around (54 (60) sts)
Size L only:
Round 59: Purl each st
Round 60 [dec]: *K 7, [sl 1, k 1, psso], rep from * around (48 sts)
Continue to Hat Top section.
Size XL only:
Rounds 63-65: Work in pattern
Round 66: *K 8, [sl 1, k 1, psso], rep from * around (54 sts)
Round 67: Purl each st
Round 68: *K 7, [sl 1, k 1, psso], rep from * around (48 sts)
Continue to Hat Top section.
Hat Top
At some point soon, the circular needle will be too long to work the number of stitches. When this happens, slide stitches onto double-pointed needles and work in the round to knit the rest of your bucket hat.
Sizes Small and (Medium)
Size S only:
Round 33: Purl each st
Both sizes:
Round 34 (42) [dec]: *K 8 (10), [sl 1, k 1, psso], rep from * around (54 (66) sts)
Round 35 (43): Purl each st
Round 36 (44) [dec]: *K 7 (9), [sl 1, k 1, psso], rep from * around (48 (60) sts)
Round 37 (45): Purl each st
Round 38 (46) [dec]: *K 6 (8), [sl 1, k 1, psso], rep from * around (42 (54) sts)
Round 39 (47): Purl each st
Round 40 (48) [dec]: *K 5 (7), [sl 1, k 1, psso], rep from * around (36 (48) sts)
Round 41 (49): Purl each st
Round 42 (50) [dec]: *K 4 (6), [sl 1, k 1, psso], rep from * around (30 (42) sts)
Round 43 (51): Purl each st
Round 44 (52) [dec]: *K 3 (5), [sl 1, k 1, psso], rep from * around (24 (36) sts)
Round 45 (53): Purl each st
Round 46 (54) [dec]: *K 2 (4), [sl 1, k 1, psso], rep from * around (18 (30) sts)
Round 47 (55): Purl each st
Size M only:
Round 56 (dc): *K 3, [sl 1, k 1, psso], rep from * around (24 sts)
Round 57: Purl each st
Round 58 [dec]: *K 2, [sl 1, k 1, psso], rep from * around (18 sts)
Round 59: Purl each st
Both sizes:
Round 48 (60) [dec]: *K2tog, rep from * around (9 sts)
Using tapestry needle, thread through all remaining stitches and pull tight to close top. Fasten off and weave in any remaining ends.
Sizes Large and (Extra Large)
In this section, the Round numbers differ between sizes, but the instructions and stitch counts are the same.
The first number listed is the round number for the large size. The second number listed in parentheses is the round number for the extra-large size → Round L (XL).
Round 61 (69): Purl each st
Round 62 (70) [dec]: *K 6, [sl 1, k 1, psso], rep from * around (42 sts)
Round 63 (71): Purl each st
Round 64 (72) [dec]: *K 5, [sl 1, k 1, psso], rep from * around (36 sts)
Round 65 (73): Purl each st
Round 66 (74) [dec]: *K 4, [sl 1, k 1, psso], rep from * around (30 sts)
Round 67 (75): Purl each st
Round 68 (76) [dec]: *K 3, [sl 1, k 1, psso], rep from * around (24 sts)
Round 69 (77): Purl each st
Round 70 (78) [dec]: *K 2 [sl 1, k 1, psso], rep from * around (18 sts)
Round 71 (79): Purl each st
Round 72 (80) [dec]: *K2tog, rep from * around (9 sts)
Using tapestry needle, thread through all remaining stitches and pull tight to close top. Fasten off and weave in any remaining ends.
Hit the cafe, festival, or farmer’s market and show the world how cute a knit bucket can be!
FAQs
While it’s technically possible to create a bucket hat with straight needles, most knitters use circular or double-pointed needles to work in the round and avoid seaming.
This free knitted bucket hat pattern uses circular and double-pointed needles for that exact reason.