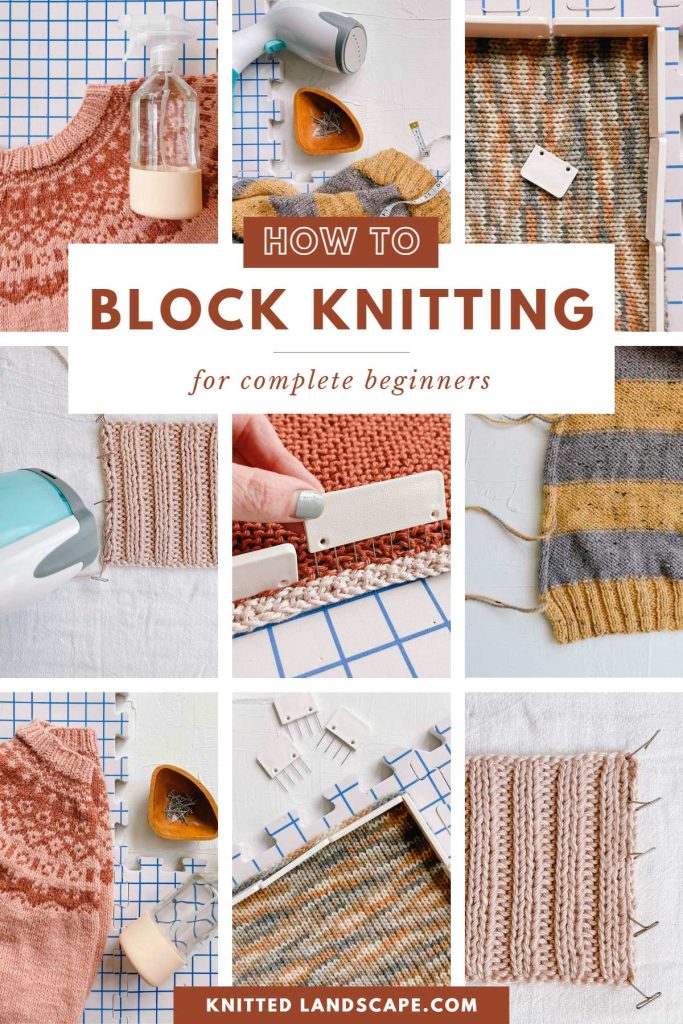
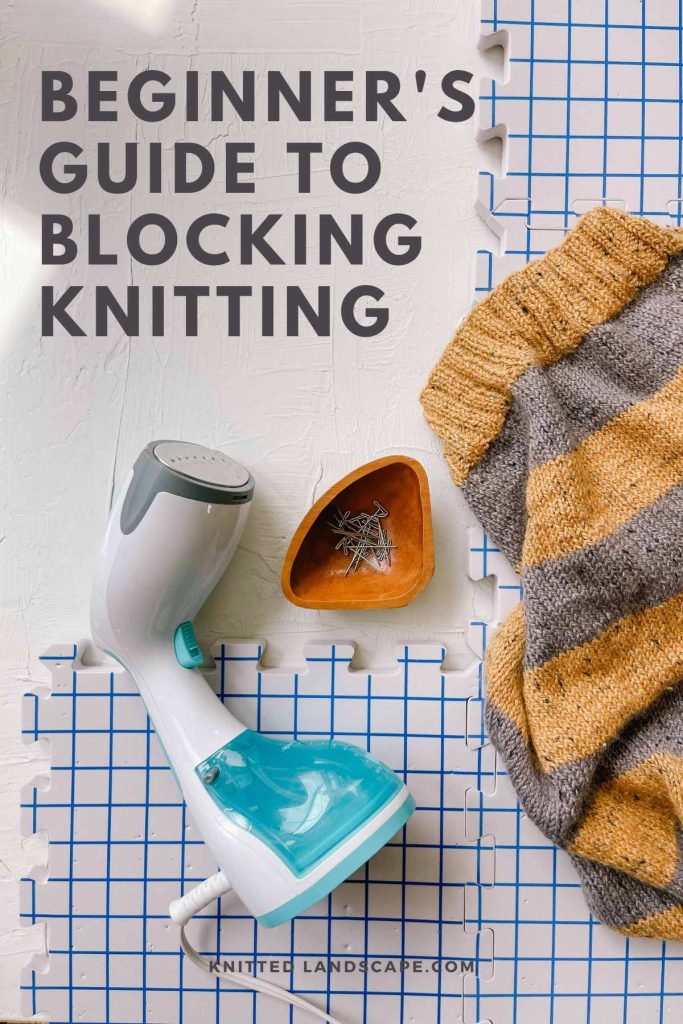
Beginner’s Guide: How To Block Your Knitting
Blocking is a crucial step that can take your finished knits from good to great. But do you know how to block knitting and why it’s important?
In this beginner’s guide, we explore everything you need to know about blocking, what types of knitting can benefit from it, and tips for success, no matter the fiber.
What is Blocking in Knitting?
Blocking is shaping and sizing a finished knit project by manipulating its fibers. The process usually involves dampening the knit fabric by soaking, spraying, or directing steam at it.
Why It Matters
Think of blocking your knitting like trimming the edge of your lawn after mowing it. Can you get by without it? Yes. But taking the extra step makes a massive difference in the tidiness of the finished project.
Blocking your knitting helps smooth out uneven stitch tension and improves the drape and overall appearance of a finished garment. It opens up lace stitch patterns and can even help you meet the desired dimensions of the pattern if you’re off by an inch or two.
While blocking can help make your knits slightly larger, it’s worth noting that it can’t shrink knitting that turned out too big.
Types of Blocking
There are three main ways to block a knitting project: wet blocking, steam blocking, and spray blocking.
No need to get overwhelmed, though! Here’s a quick summary of how each method works.
- Wet blocking: You’ll start by soaking your finished project in water and then shape it into the desired dimensions. This technique is effective for evening out inconsistencies in tension and adjusting proportions, such as stretching the sleeves of a sweater.
- Steam blocking: This method uses an iron or steamer to add moisture to the project while you shape it. You won’t actually touch the iron to the yarn, as this can cause damage.
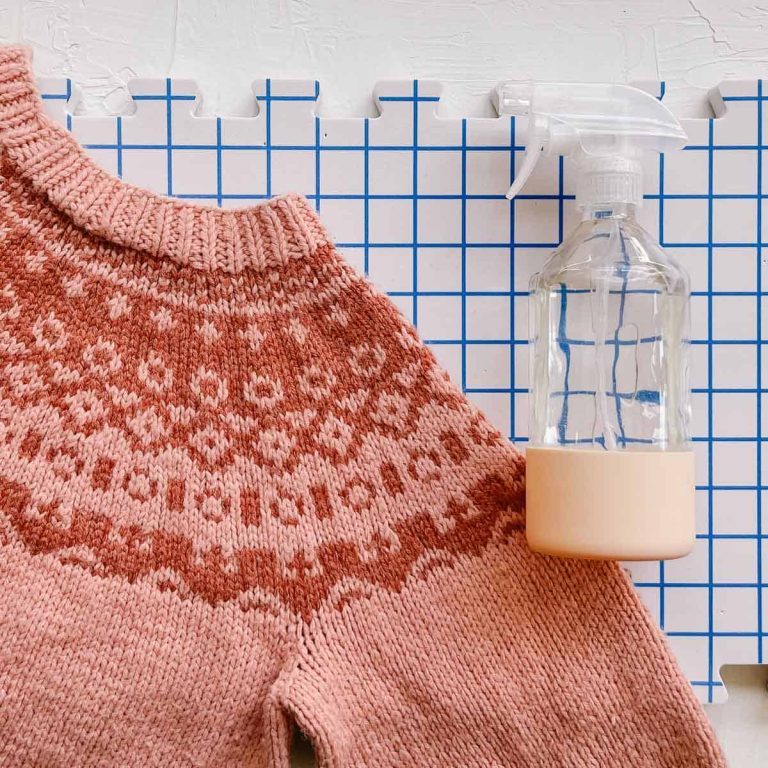
- Spray blocking: For a quick and easy blocking process, mist your project with water using a spray bottle, then shape it as desired. This method is handy for delicate projects that can’t handle a lot of moisture.
Quick Start Guide: How to Wet Block Knitting
Here’s a summary of the steps to follow when wet blocking your knitting. Keep reading for more detailed instructions.
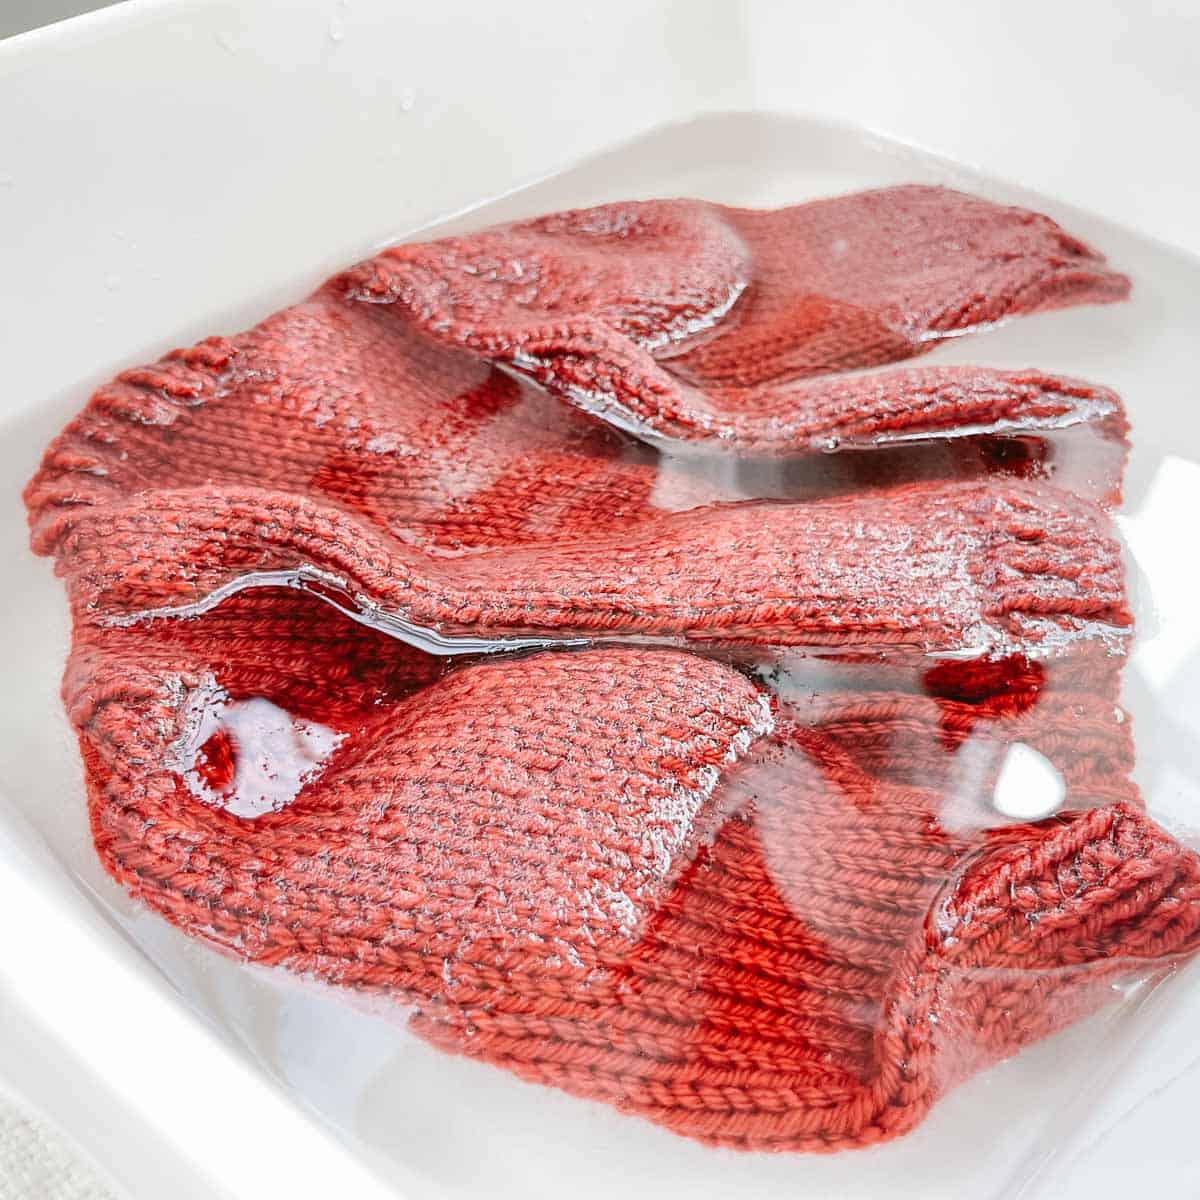
- Fill a sink or basin with lukewarm water. Add a wool wash or gentle detergent if you’d like.
- Gently submerge your knitting in the water. Press down to remove air bubbles and ensure it’s fully saturated.
- Let your garment soak for about 15 to 20 minutes.
- Drain the water and gently press the excess water out of your knitting. Avoid twisting or wringing it, as this can damage the fibers.
- Lay your knitting on a clean towel and gently roll it up to squeeze out any remaining water.
- Lay the knitted item flat on a blocking mat or towel. Shape it to the desired measurements and pin it in place.
- Let your knitting dry completely before unpinning.
Do I Need to Block My Knitting?
While blocking has many benefits, you may be wondering, “Do I have to block my knitting?” The short answer is no. Particularly when using acrylic or polyester yarn, blocking may be unnecessary.
However, if you choose not to block knitted lace, you’re selling your hard work short. The stitches are unlikely to “open up” to their full, beautiful potential.
With other projects, not blocking your knitting might be a missed opportunity to make it look more polished.

Projects That Benefit from Blocking
Blocking is beneficial for many knitting projects, including:
Gauge Swatches:
If your knitting pattern tells you to block the finished project, you’ll also want to block your gauge swatch. The pattern gauge listed likely presumes the final, blocked stitch tension.
Lace:
Delicate knit shawls, scarves, dresses, and tops will look better after a simple blocking. For lace knitting, blocking can help to stretch and define the lace pattern, allowing it to open up and show off its intricate design.
Socks:
They may not seem like they need it, but a sock blocker can help form finished socks to the correct foot size.
Garments:
Knit sweaters look best when the fabric can drape as evenly and beautifully as possible. This is especially useful for garments with intricate shaping or design elements, such as cables or colorwork.
Blocking also helps ensure your garment’s finished measurements meet what’s listed in the pattern.
Colorwork:
Because blocking can even out stitch tension, it can make colorwork appear more crisp.

Tips for Success
Blocking knitting can be a fairly easy process. Here are some tips that apply to any method of blocking.
- Always check the care label of your yarn before blocking, as some fibers require special treatment.
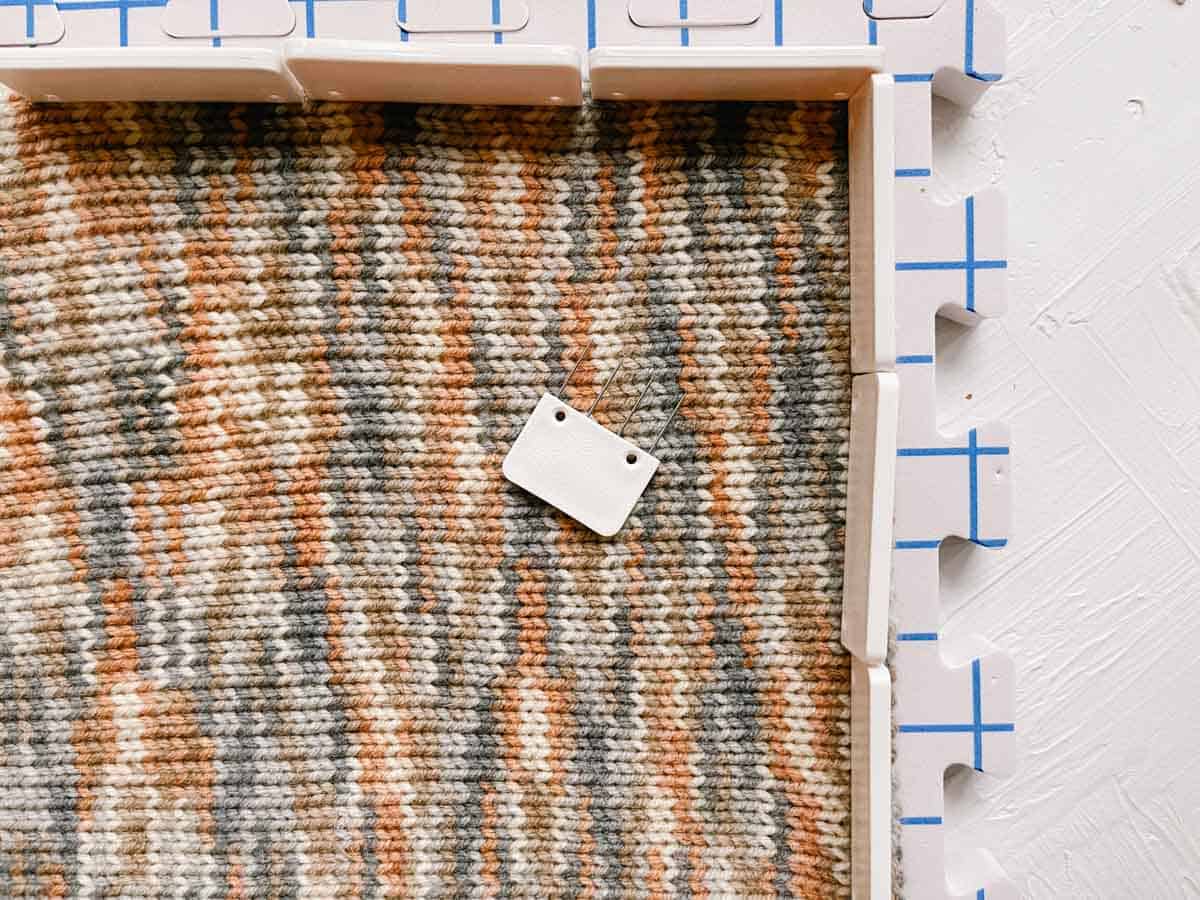
- When stretching knit items, place pins close together to avoid the fabric shrinking around the pins and creating points. Alternatively, you can use knit blockers to achieve straight edges without fussing with individual pins.
- As you shape your fabric, stretch the stitches evenly throughout the project, not just at the edges.
- If you’re unsure about blocking, try it on a swatch first to see how it affects your yarn.
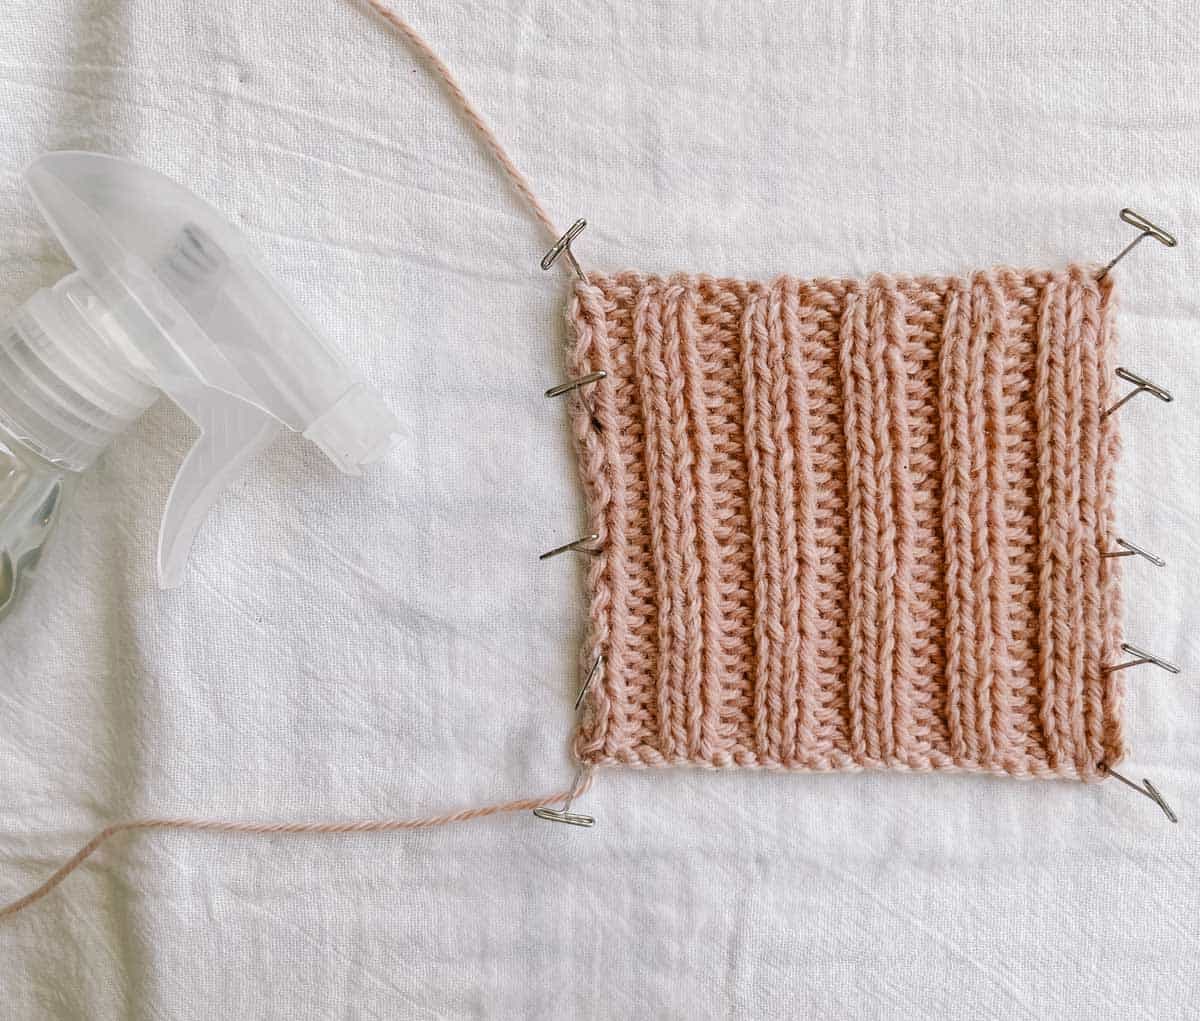
- Blocking knit ribbing in the stretched position will cause it to lose elasticity. Instead, make sure it’s fully contracted when pinning ribbing to your blocking mat.
- Blocking in direct sunlight or near a heat source can cause the yarn fibers to dry out too quickly and become brittle, so choose a shaded area instead.
Common Methods
There are different methods of blocking, each suited for different types of fibers and projects. Here is a closer look at the three most common types of blocking, plus a bonus method of dry blocking if you’re short on time.
Click the type of blocking below to jump to that section:
How to Wet Block Step-By-Step
Wet blocking is the most common and traditional method of blocking. It involves submerging the knitted piece in water to allow the fibers to loosen and relax. Wet blocking works well for most types of knit fabrics, but it’s important to check your yarn label to make sure.
Here’s how to wet block:
Step 1. Prepare the Water
Fill a sink or basin with lukewarm water and add a small amount of wool wash or gentle detergent if you’d like. (Hot water can cause wool to felt, so avoid it here!)
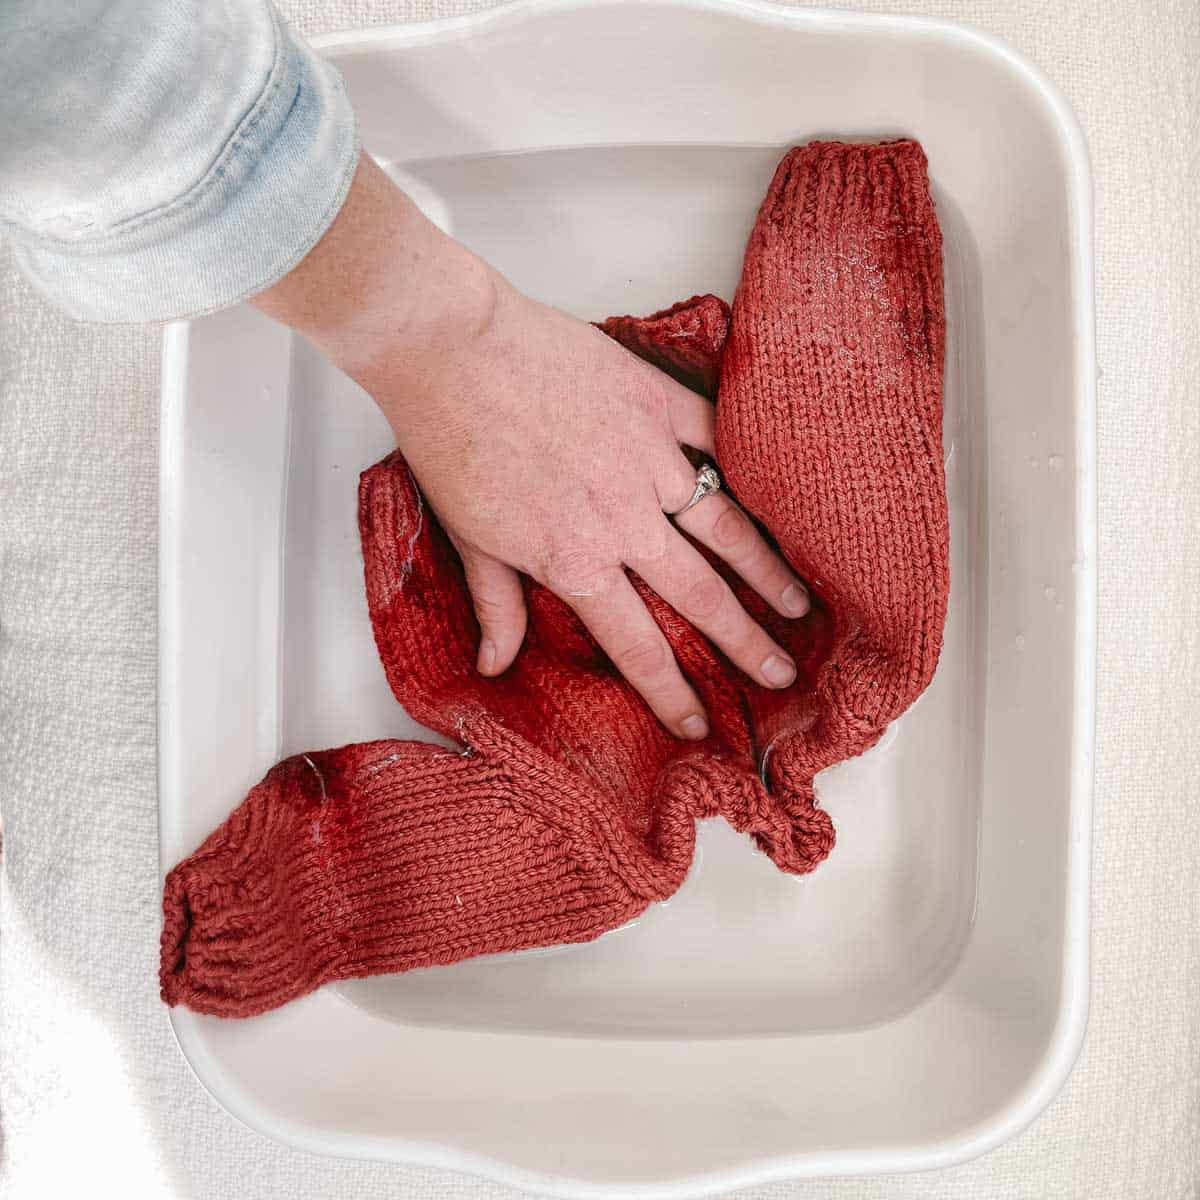
Step 2. Soak Your Knitting
Gently submerge your knitting in the water and allow it to soak for 20-30 minutes or until it is completely saturated. Do not agitate or scrub, as this can cause certain animal fibers, like wool, to felt.
Pro Tip: Some knitters prefer to immerse their project in water and remove it quickly without soaking. Both options can work as long as the fibers are moist enough to stretch.
Step 3. Remove Excess Water
After soaking, carefully remove your knitting and gently press out any excess water. Do not wring or twist the garment, as this can damage the fibers. At this point, your project can be heavy, so avoid letting it hang and stretch out under the weight of itself.
Step 4. Shape the Item
Lay the garment flat on a blocking mat or board and gently nudge it to the desired size and shape, using pins or blocking wires to hold it in place. Smooth out any wrinkles or bumps. Blocking wires can help ensure knit scarves, shawls, and blankets have straight edges.
Step 5. Allow to Dry
Allow the garment to dry completely. This can take up to 24 hours or more, depending on the size and thickness of the garment.
Step 6. Remove Pins and Enjoy
Once the garment is dry, remove the pins or blocking wires. Your new knit item is now ready to use!
How to Steam Block With An Iron
Steam blocking is a quicker alternative to wet blocking and can be especially helpful for impatient knitters with time constraints. Blocking knitting with steam is also my favorite way to tidy up projects made with acrylic or acrylic blend yarn.
A very important note: never touch the hot iron or steamer directly to the yarn. Too much heat can “kill” (AKA melt) man-made fibers such as acrylic or polyester.
Follow these steps to steam block your knitting:
- Fill the water reservoir of a steamer or steam iron with distilled water and set it to the lowest steam setting. (It’s said that using tap water can damage the iron or knitting due to the presence of minerals or impurities, but I do it all the time. Choose your level of risk.)
- Lay the knit garment flat on a blocking surface, removing any wrinkles or bumps.
- Gently maneuver the garment to the desired size and shape, placing blocking wires or pins along the edges. Maintain an even tension and avoid stretching the garment too much.
- Hold the iron/steamer a few inches from the fabric and allow the steam to penetrate the fibers. Move slowly and evenly over your knitting without hovering in one spot for too long.
- Steam-blocked items tend to dry sooner than wet-blocked items, but it’s still important to let your knitting cool completely.
- Once cool, remove the pins or blocking wires and admire the new, improved shape and appearance of your knitting.
How To Spray Block
Spray blocking is a nice option for beginners as it can be less intimidating than wet or steam blocking. It’s also a good choice for fine or delicate knits that should avoid excessive moisture.
Most natural fibers respond well to spray blocking and relax enough to stretch to your desired dimensions.
Here’s how to spray block your knitting:
- Fill a clean spray bottle with warm water. (Optional: add a small amount of wool wash or gentle detergent. Gently shake the bottle to mix the solution.)
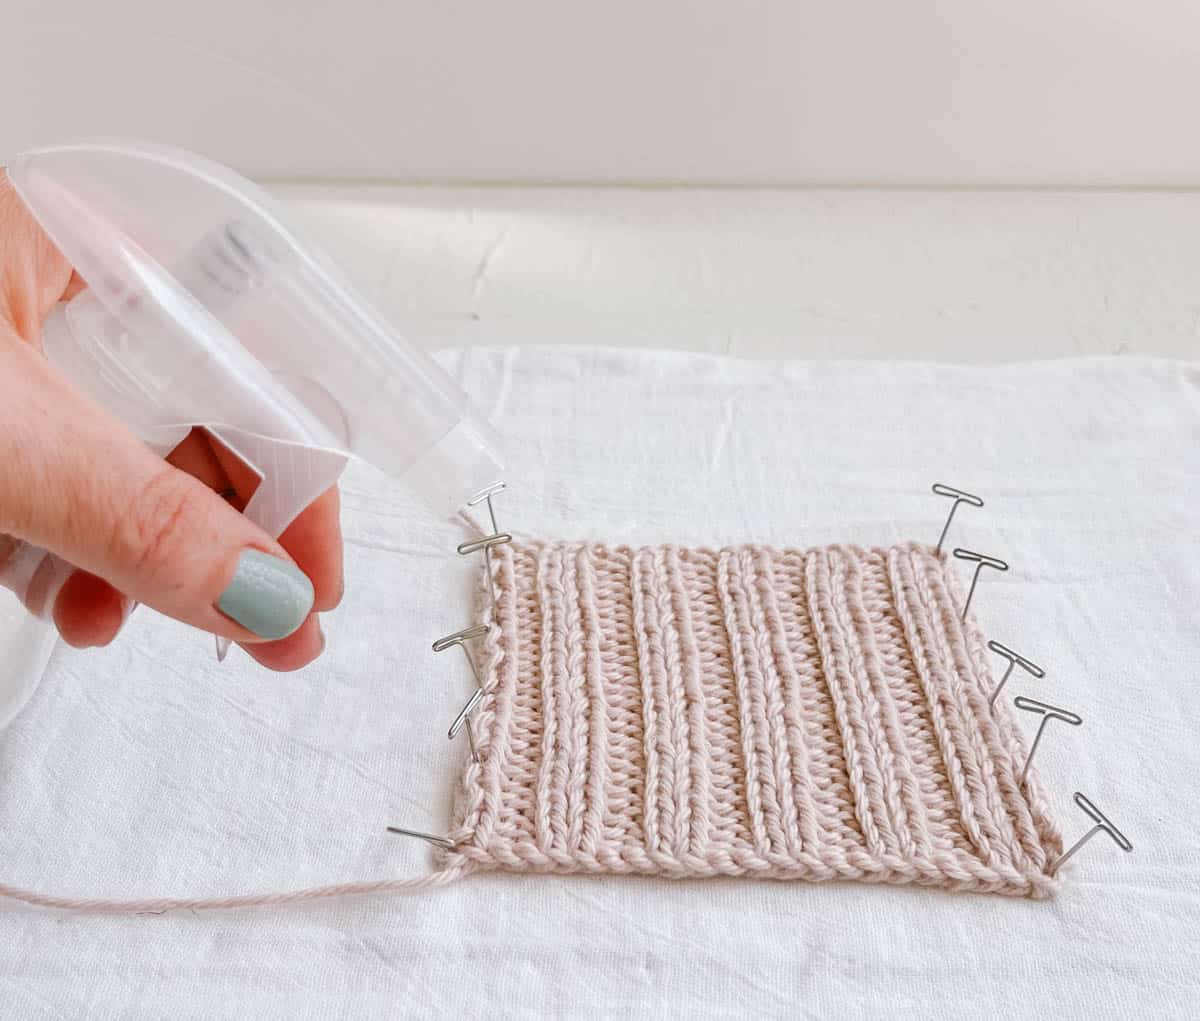
- Lay the knit item flat on a blocking mat or board, smoothing out any wrinkles or bumps.
- Hold the spray bottle a few inches away from the garment and spritz it lightly with the water solution. Avoid using too much water, as this can cause sections to stretch or distort.
- Gently nudge your knitting to the desired size and shape. Place pins or blocking wires to hold it in place. Maintain an even tension without stretching the piece too much.
- Allow your project to dry completely.
- Once your item is dry, remove the pins and enjoy your finished piece.
How To Dry Block
While blocking with moisture is the preferred way to finish knit projects, it can take up to 24 hours to complete.
If you need a shortcut, follow these simple steps to dry block your knitting. You can think of dry blocking as manually “organizing” your stitches to appear more tidy and even.
Step 1: Pull the Fabric Sideways
For narrow projects, grab the edges and pull them in opposite directions.
For wider or round projects, fold the sides of the fabric leaving a few inches between the folds. Grab the folds and pull them in opposite directions until each stitch is pulled sideways.
Step 2: Pull The Fabric Lengthwise
With short projects, like cowls or mittens, pull the cast-on and bind-off edges in opposite directions.
For longer projects, make horizontal folds and pull sections of the fabric until every stitch is stretched lengthwise.
Step 3: Even Out “Stubborn” Stitches
Pull neighboring stitches with your fingers or a yarn needle to make the stitches more uniform. For example, to make a big stitch smaller, pull the left leg of the stitch at the right side of the big stitch and the right leg of its neighbor on the left.
To make the stitches even more consistent, pull this smaller section the fabric sideways as in step 1, then lengthwise as in step 2. Repeat this process until all “stubborn” stitches are evened out.
How to Block Without a Board, Mat, or Pins
You can still block your knitting projects using basic household supplies if you don’t have a blocking board, mat, or pins. In fact, this is exactly how I did it for my first 30 years of knitting!
How to block knitting without extra supplies:
- Soak your finished knitting piece in lukewarm water with a mild detergent for 15-20 minutes. Ensure the piece is fully submerged, and press out any air bubbles.
- Remove the piece from the water and gently squeeze out the excess water. Avoid wringing or twisting the fabric.
- Lay a clean, dry towel on a flat surface. Place your knitting piece on the towel and smooth it out to the desired shape and size.
- Roll up the towel with the knitting piece inside, pressing softly to remove excess water.
- Unroll the towel and transfer your knitting piece to a fresh, dry towel or a flat surface where it can air dry. Reshape your piece as needed. Depending on your flooring, you may even find that you can press T-pins into your carpet and rug pad below as you would with a blocking board.
(Of course, this approach comes with some risk to your floor and shouldn’t be attempted in extremely humid climates.) - Leave the knitting piece to dry completely before unpinning it.
Best Methods for Acrylic, Cotton, and More
When you start thinking about blocking your knitting, one of your first questions will likely be “How to I block ____ yarn?”
While I always suggest checking the yarn label for any care instructions that could offer some clues, here are some general guidelines for blocking techniques that work well for each fiber type.
| Method | Wet Blocking | Steam Blocking | Spray Blocking |
|---|---|---|---|
| Works well for fiber type | Wool Merino Cotton Linen | Cotton Acrylic Polyester Nylon Rayon Modal Viscose | Cashmere Merino Mohair Alpaca Silk Bamboo Wool Angora Linen |
Should I Block Knitting Before or After Seaming?
Some patterns will tell you to block all the pieces before joining them. But some knitters swear by seaming and then blocking at the end. Here are the reasons you might choose one over the other.
Blocking Before Joining
Blocking before finishing allows any errors in size or shape to be corrected before everything is pinned together. Is your sleeve too narrow for the armhole? Blocking to the rescue!
Seaming can also create tension in the fabric that may be difficult to correct after you’ve joined the pieces together. Blocking knitting before seaming can help avoid this.
When knitting many small motifs, like mitered squares, blocking is essential in making sure they’re all the same size before joining them.
Blocking Finished Projects
Blocking after you’ve joined the pieces together allows you to smooth out any bulges or lumps created by seaming. And while knit sweater patterns will often tell you to block before joining, many renegade knitters sew everything together and block at the end.
Blocking Knitted Blankets and Other Large Items
The best way to block larger projects like hand knitted blankets is to lay them flat on a large sheet after wet or spray blocking.
Because it can be hard to have enough blocking board surface to pin down a baby blanket or larger afghan, using a sheet and skipping the step of pinning is an effective workaround while you allow your project to dry.
Blocking Supplies + Materials
As we discussed above, you can block knitting without a blocking board, steamer or pins. With that said, having a few specific supplies makes the whole process much easier.
T-Pins
T-pins are exactly what they sound like–sturdy pins in the shape of a T. I recommend using rust-free pins and stainless steel blocking wires. Regular pins or wires can leave rust marks on the garment or may not be strong enough to hold heavier knits.
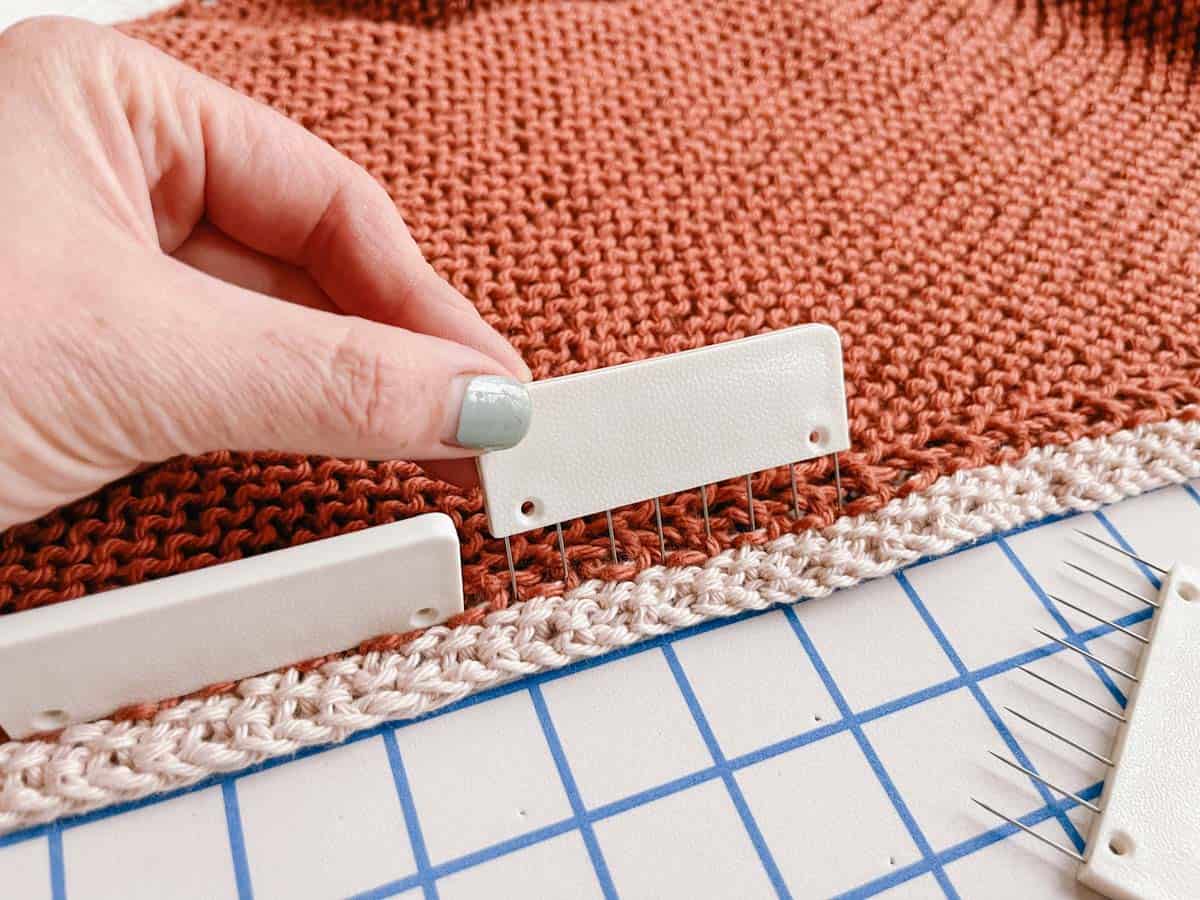
Knit Blockers (aka Combs)
Knit blocking combs are a less fiddly alternative to T-pins. Since the pins are evenly spread across the comb, they also help keep the edges of your item straight.
Tape Measure
Use a tape measure to check the final dimensions against what’s listed in a pattern schematic.
Lace Blocking Wires
Blocking wires are optional but can be useful in creating straight edges on items like knit shawls and blankets. These rust-proof wires are flexible and easy to shape, making them perfect for intricate designs.
Spray Bottle
When choosing a spray bottle, use one that sprays a nice, diffused mist instead of a direct, targeted stream.
Blocking Mats
While your carpet or a towel can work in a pinch, blocking mats provide a sturdy surface for pinning and shaping your knitwear. They come in many sizes and materials, such as foam or cork. Some boards even include grids to help you measure your knitting.
For small projects, I like to use a simple foam knee pad from the dollar store.
Blocking Basin
A blocking basin is a large container that can be used to soak your knitwear during wet blocking. Most knitters use a sink or bathtub. I’ve also used a plastic Rubbermaid tote when my sink has been questionably clean.
Bath Towel
A bath towel is useful for removing excess water from your knitwear after soaking it during wet blocking. You can also use it to wrap your project and gently squeeze out excess water.
Iron or Steamer
When steam blocking, you can use a garment steamer or an iron with steam functionality. While I finished dozens of knitting projects without owning an actual steamer, it can be a worthwhile investment because it creates a steady cloud of steam.
Blocking Solution
Using a blocking solution when wet or spray blocking can be helpful, but it’s not required. Some knitters swear by wool washes or no-rinse detergents like Eucalan delicate wash. A small amount of gentle dish detergent, like Dawn, can also work. (Be sure it’s a detergent and not soap.)
When blocking hand-dyed yarn, some people add a splash of vinegar to the soaking bath to set the dye.
Pro Tip: When you block knitted items, jot down which method you used and the final measurements of your project. Then you can refer to your notes to replicate the same blocking results on a similar project or yarn.
FAQs About Blocking Knitting
Yes, you can block knitting made with acrylic yarn, especially if it is lacy or has a stitch pattern that needs to be stretched or defined. However, be careful not to use high heat or steam, as this can melt or distort the fibers.
If the finished garment appears uneven, puckered, or doesn’t hang correctly, it may need to be blocked. Most knit items benefit from blocking, especially if the garment is lacy, has an intricate stitch pattern such as cables, or needs to be shaped to fit properly.
The tools needed to block knitting include a blocking mat or board, rust-free blocking pins or stainless steel blocking wires, a spray bottle filled with water, and a small amount of wool wash or gentle detergent.
The time it takes to block knitting varies depending on the size and thickness of the knit project and the blocking method used. Wet blocking can take up to 24 hours or more to dry completely, while steam or spray blocking can dry within a few hours.
The humidity in the air where you live and the type of yarn fiber will both affect the length of time blocking takes to dry.
While blocking can help to smooth out uneven stitches and improve the overall appearance of the finished item, it cannot fix major mistakes in knitting, such as dropped stitches or incorrect stitch patterns.